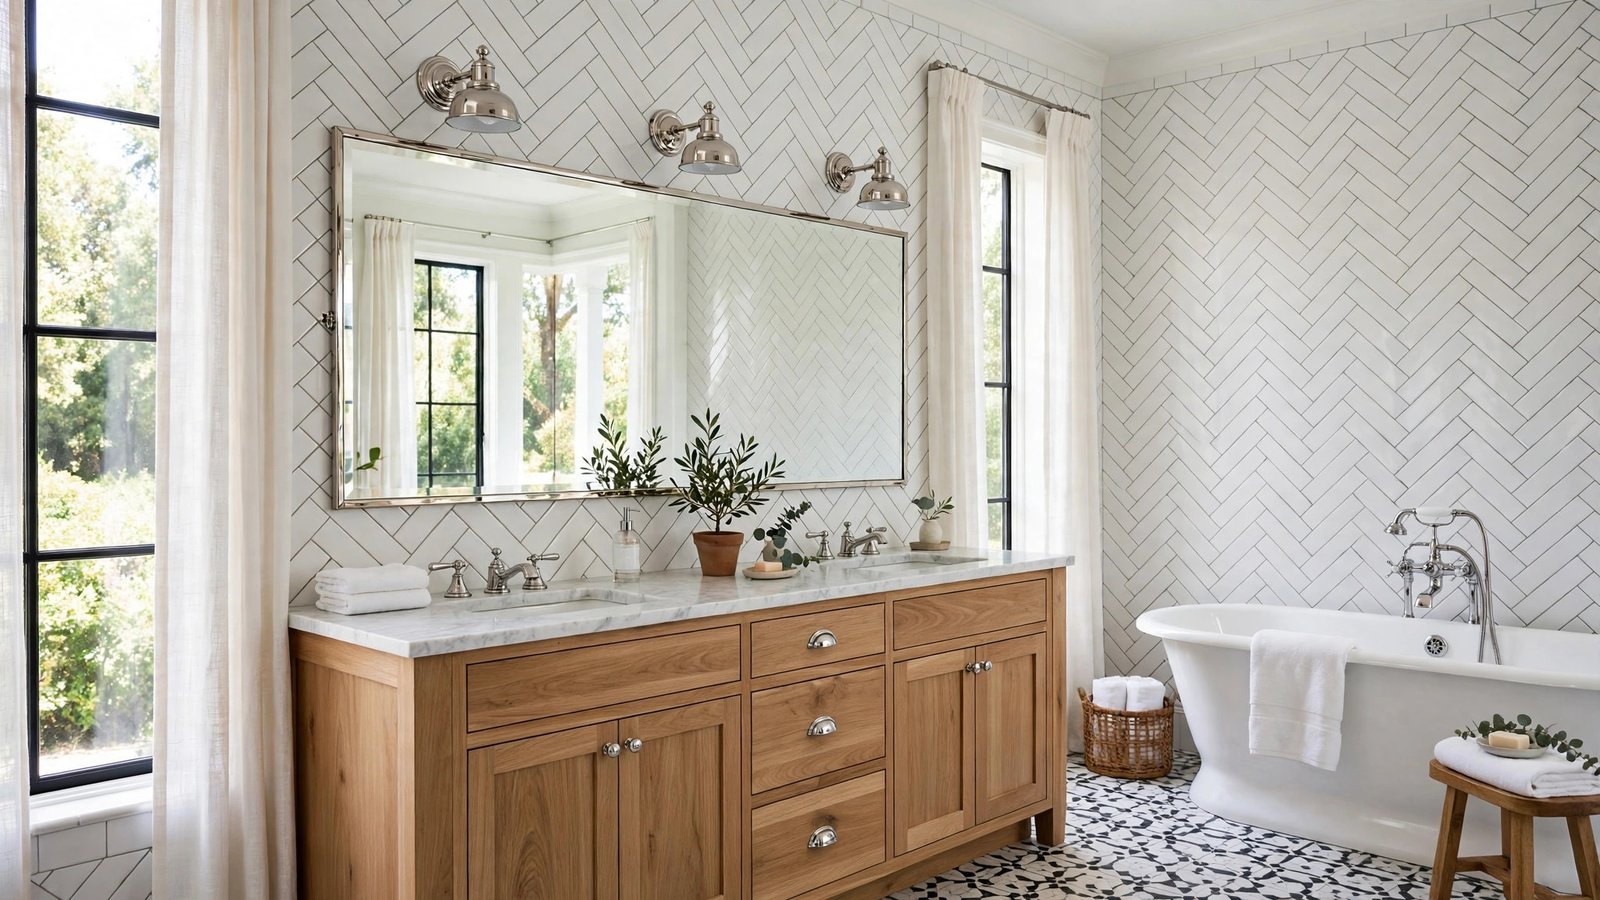
Subway tile is the safest tile you can buy — and that is exactly the problem. Laid in the same offset brick pattern as every rental bathroom, even beautiful tile goes invisible.
The tile itself is not the limit, though. The layout is. The same 3×6 rectangle can read modern, vintage, playful or luxurious depending on the direction, angle and rhythm you set it in.
Below are 19 subway tile patterns that take the classic rectangle far beyond the boring stack, with the tile sizes, grout choices and surfaces each one suits best. Every idea includes a practical tip on cost, cutting or cleaning, so you can judge the look and the workload together.
Pick one pattern for a shower wall, a vanity splash or a whole room — a new layout costs no more in tile than the standard one.
1. Vertical Stack, Floor to Ceiling
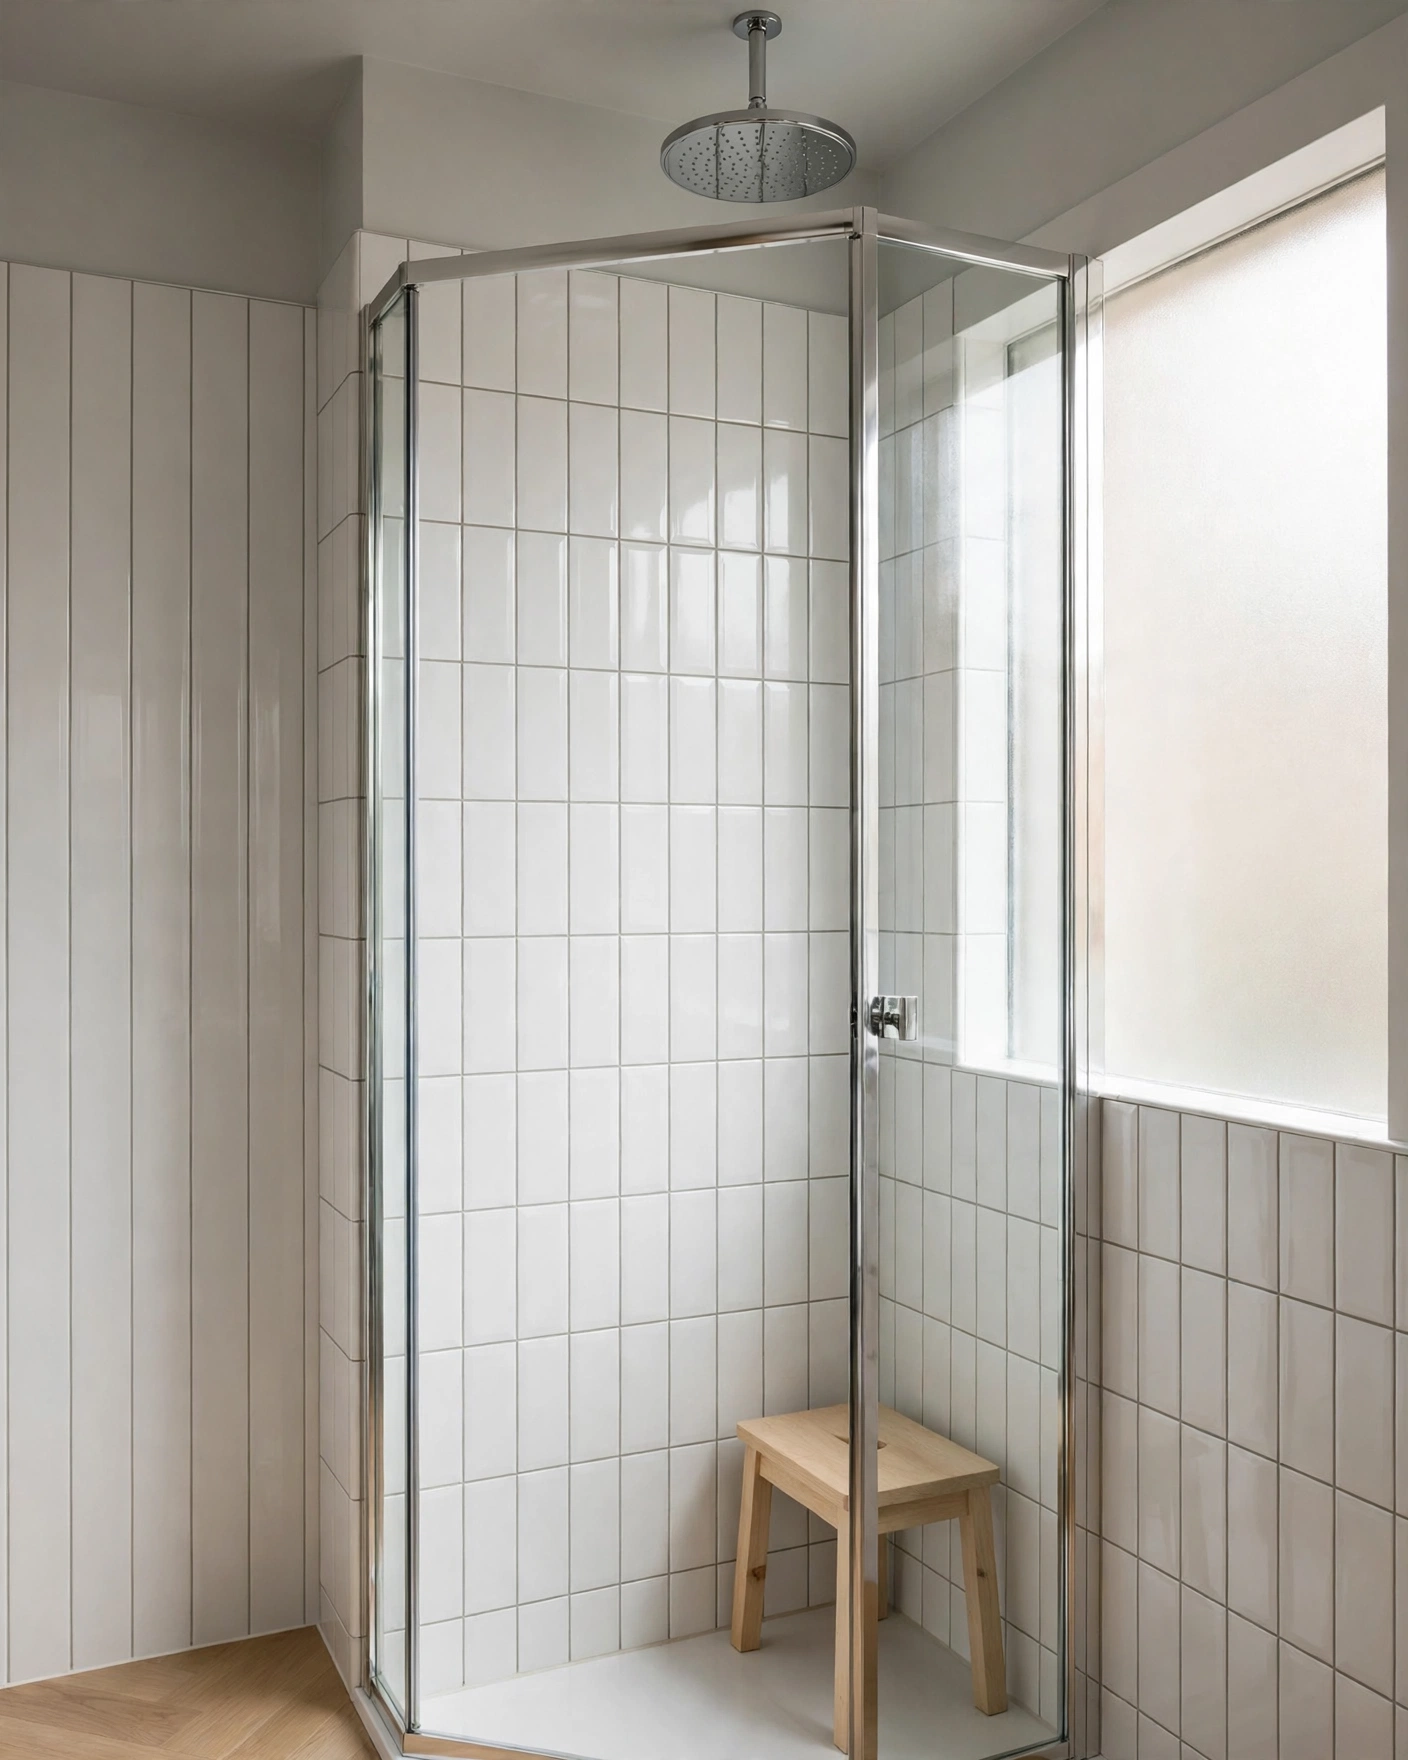
Turning the classic 3×6 tile upright and stacking it in clean columns pulls the eye upward, so a low ceiling feels taller. Run a glossy or crackle-glazed ceramic floor to ceiling in the shower for the full effect. Tip: vertical lines expose wavy walls, so prep the surface flat first.
2. Vertical Running Bond
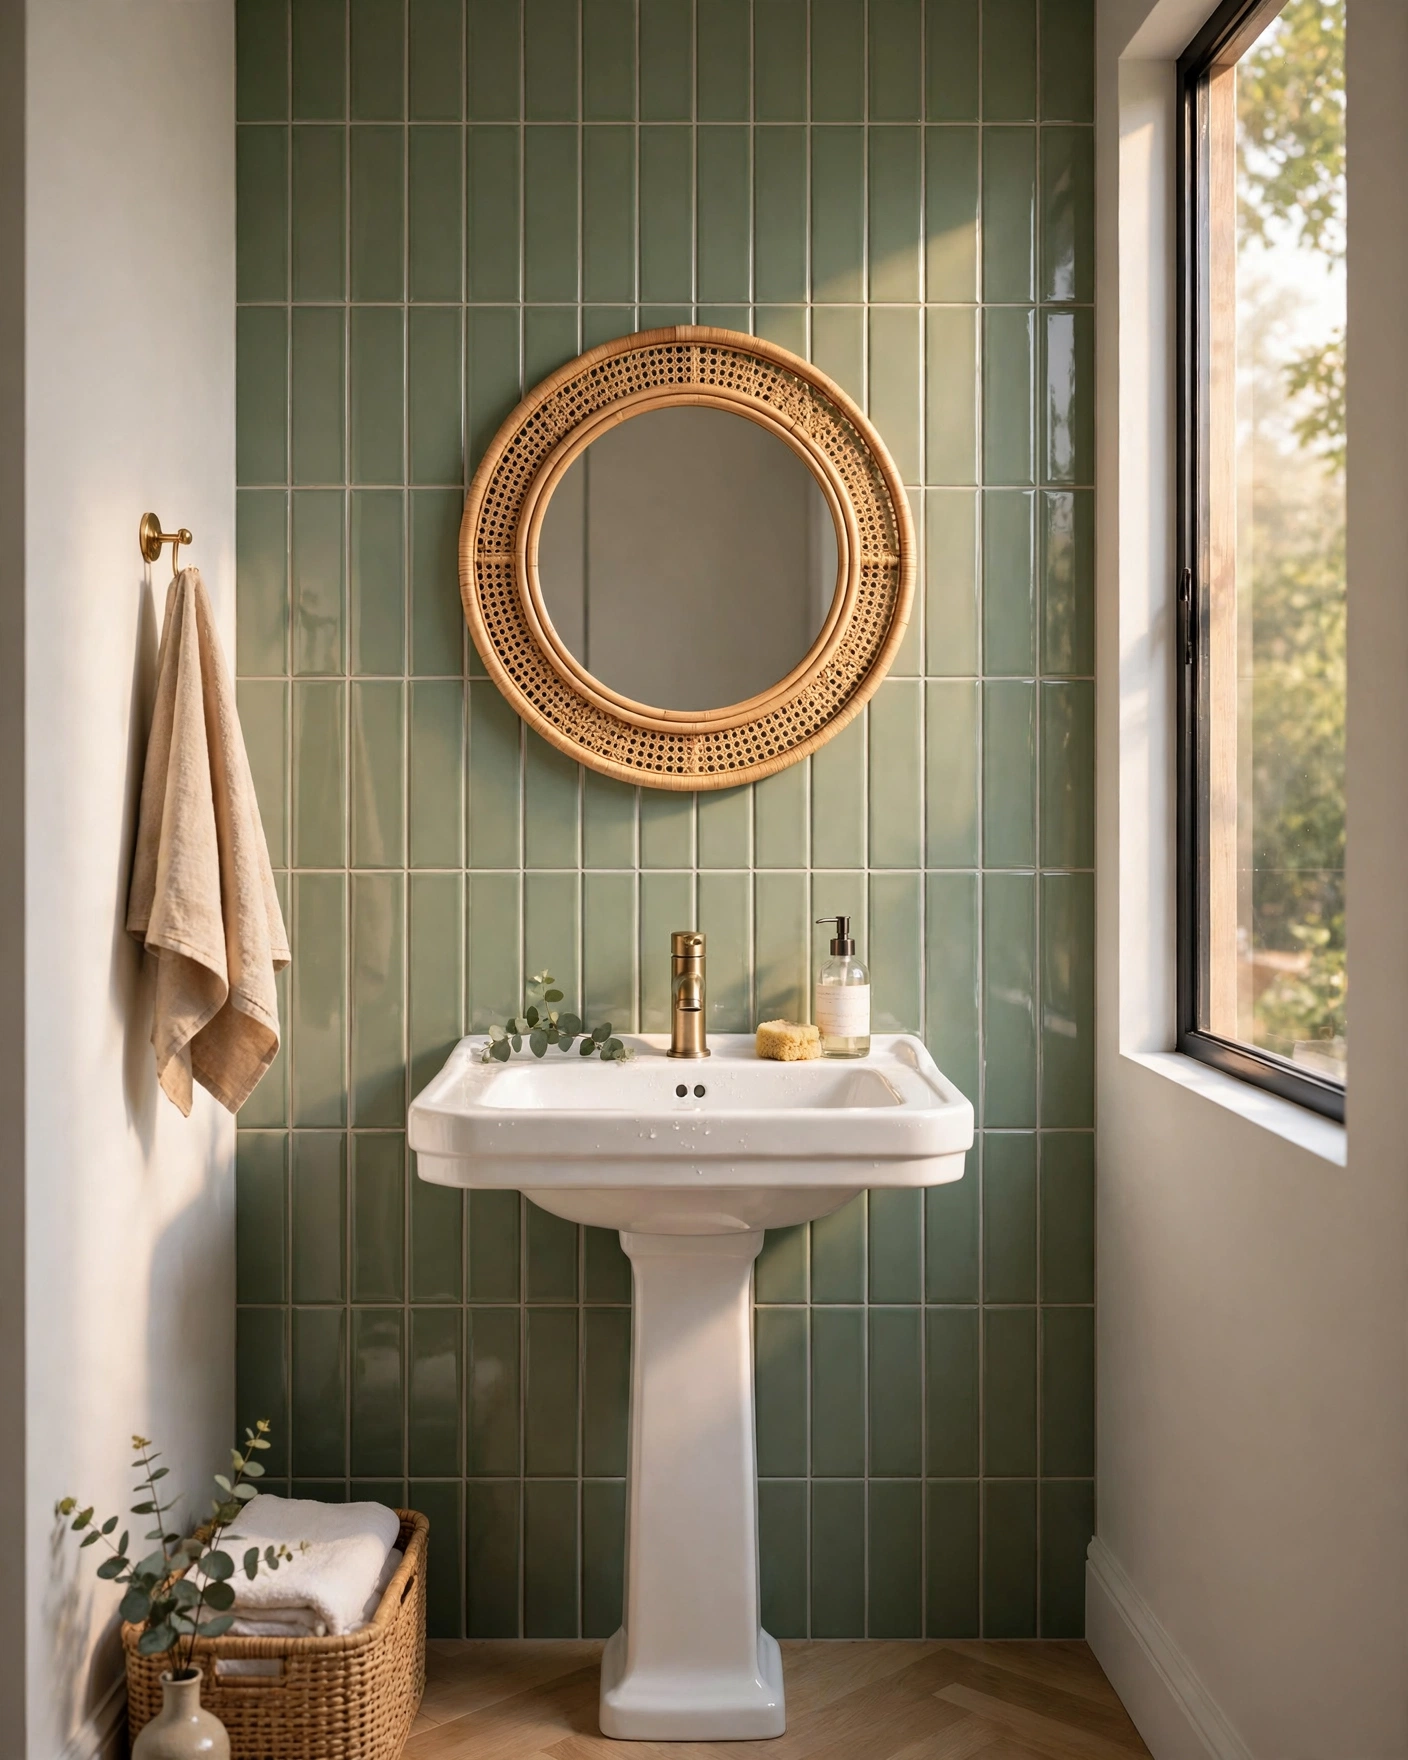
Keep the familiar half-offset rhythm of brickwork, just rotated ninety degrees: each vertical tile sits halfway across the one below. It softens the strict grid of a straight stack while still stretching the wall upward. Tip: this pattern hides slightly uneven tile heights better than a true stack.
3. Herringbone at 45 Degrees
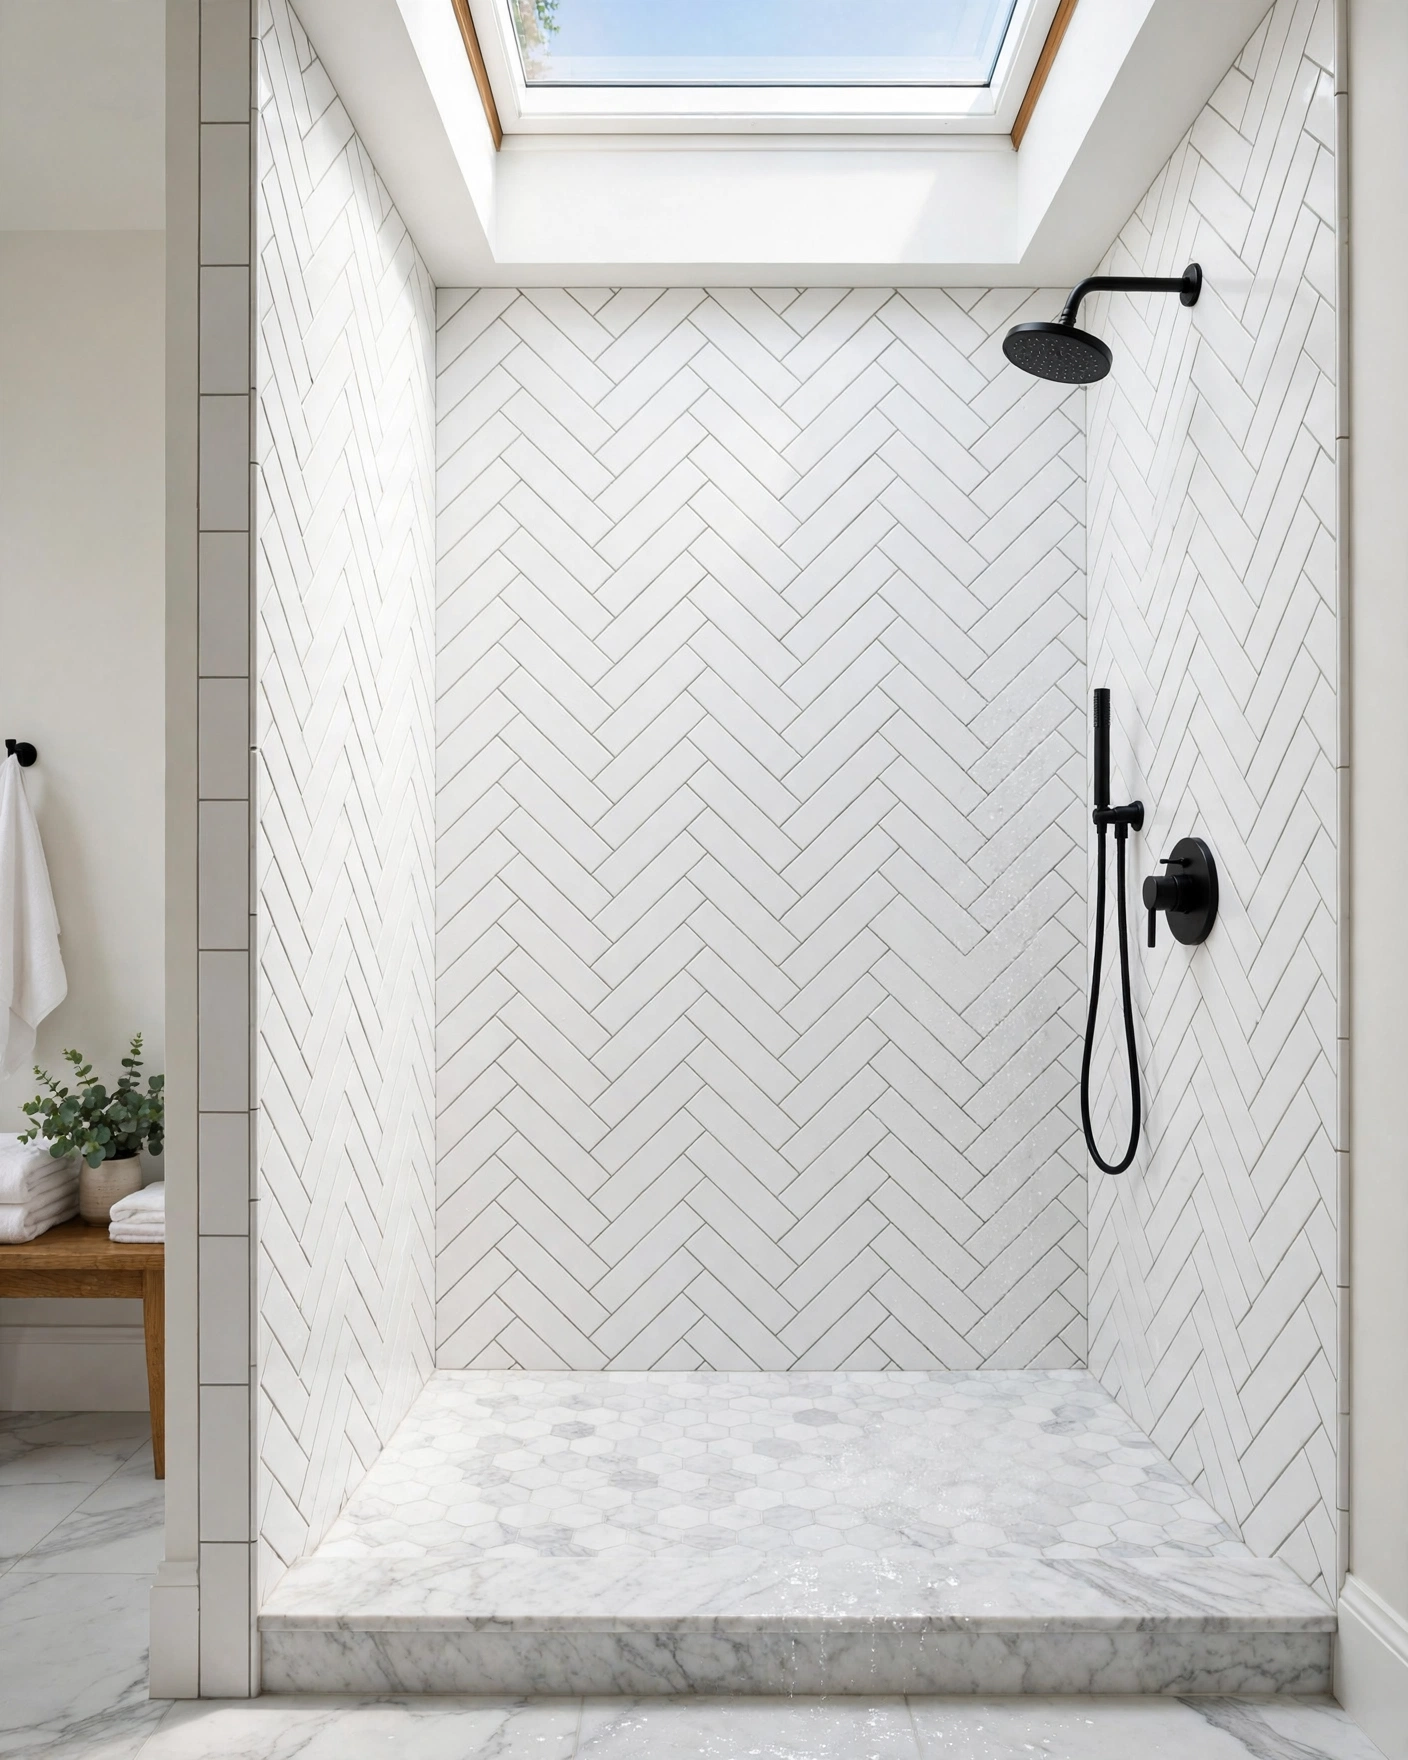
Rectangles woven at right angles and tilted forty-five degrees create the zigzag that makes plain subway tile look like a boutique hotel. Smaller 2×6 tiles give a finer zigzag on shower walls. Tip: herringbone needs about ten percent extra tile for angled cuts at the edges.
4. Straight Herringbone
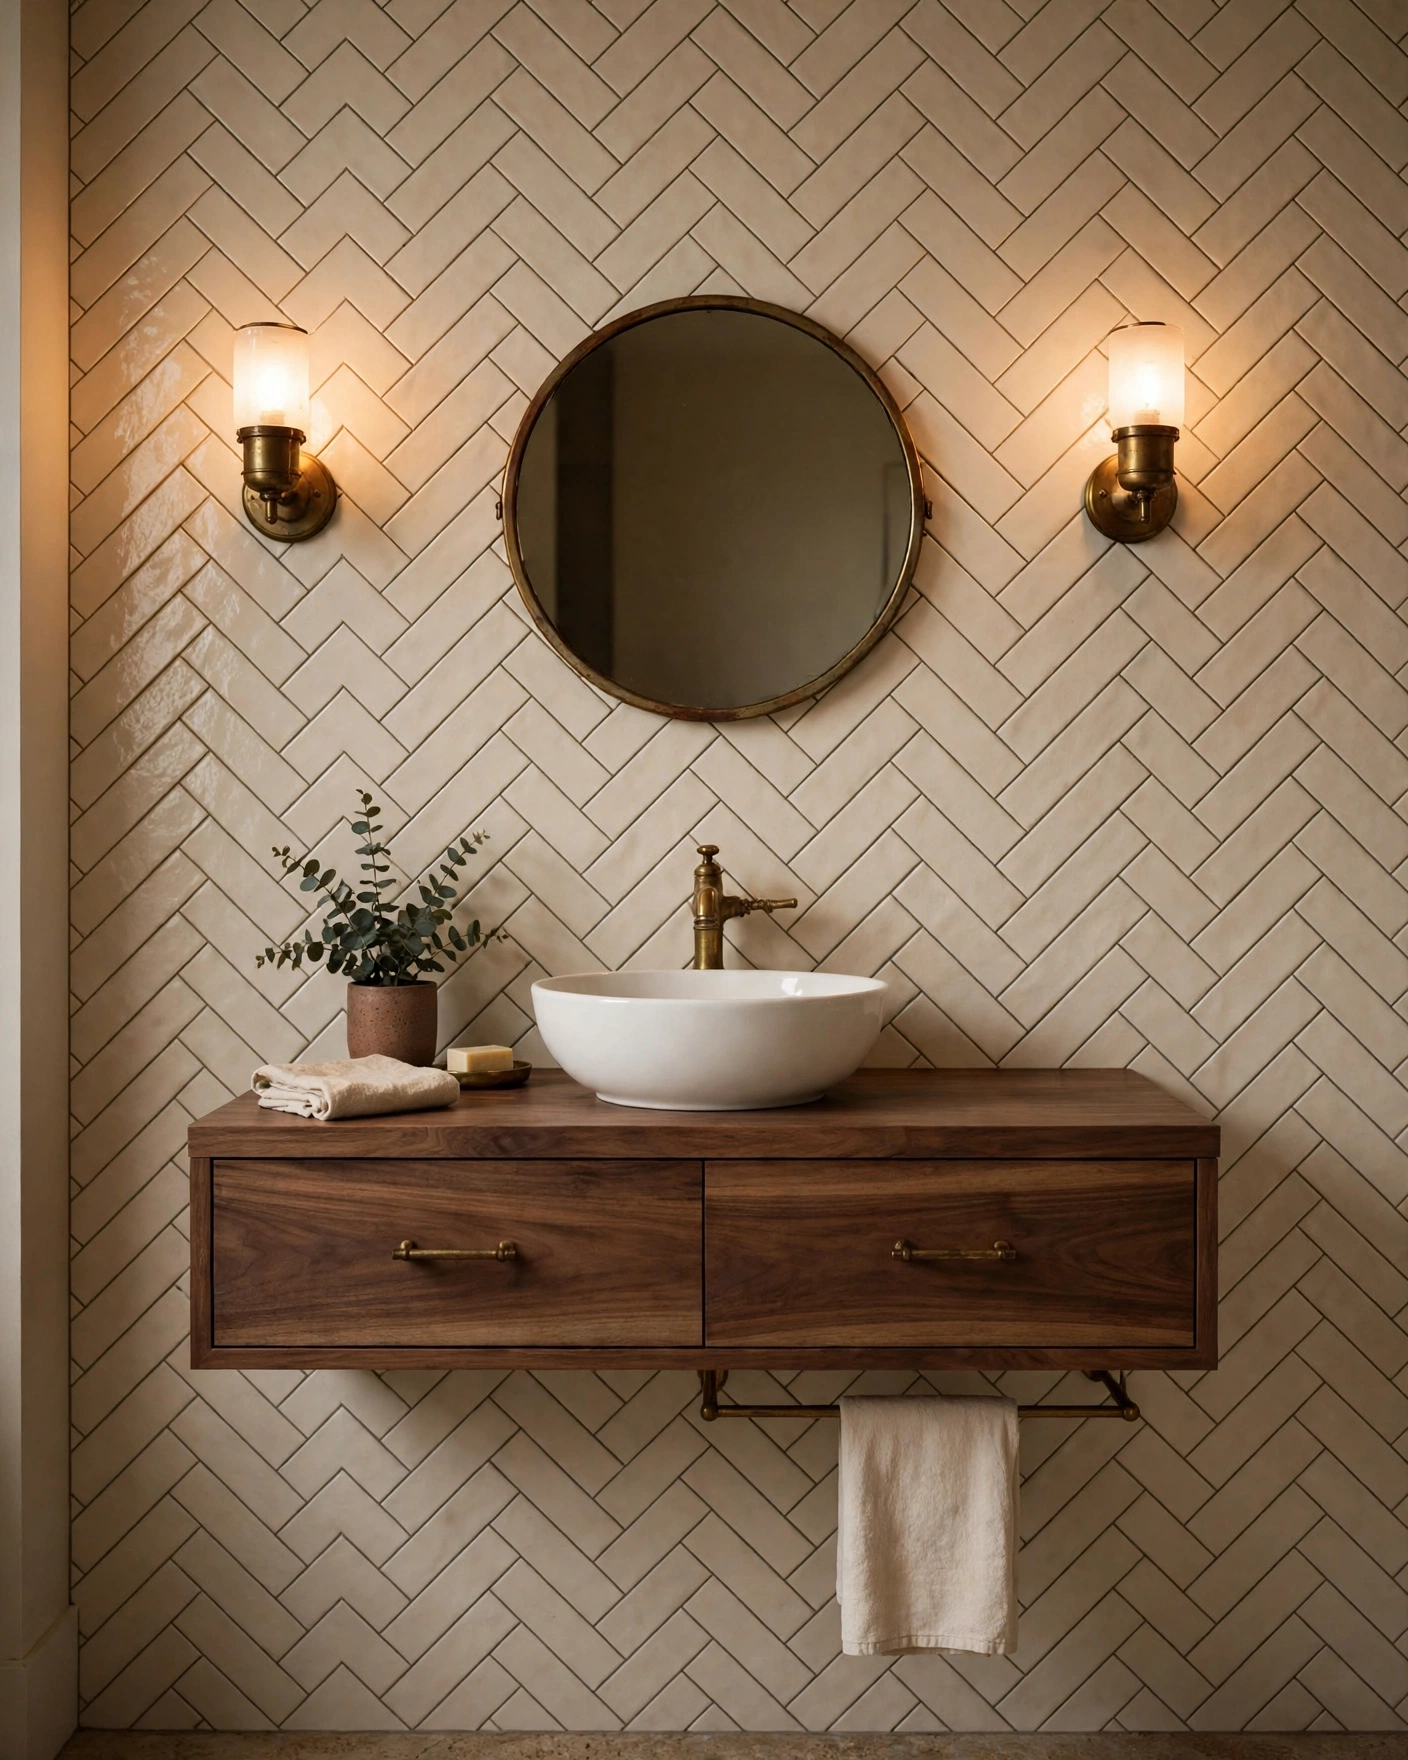
The same woven zigzag, but kept upright instead of tilted, so the pattern reads calmer and more architectural. It suits a vanity wall where you want movement without visual noise. Tip: dry-lay a square metre on the floor first to lock in your starting corner.
5. Chevron
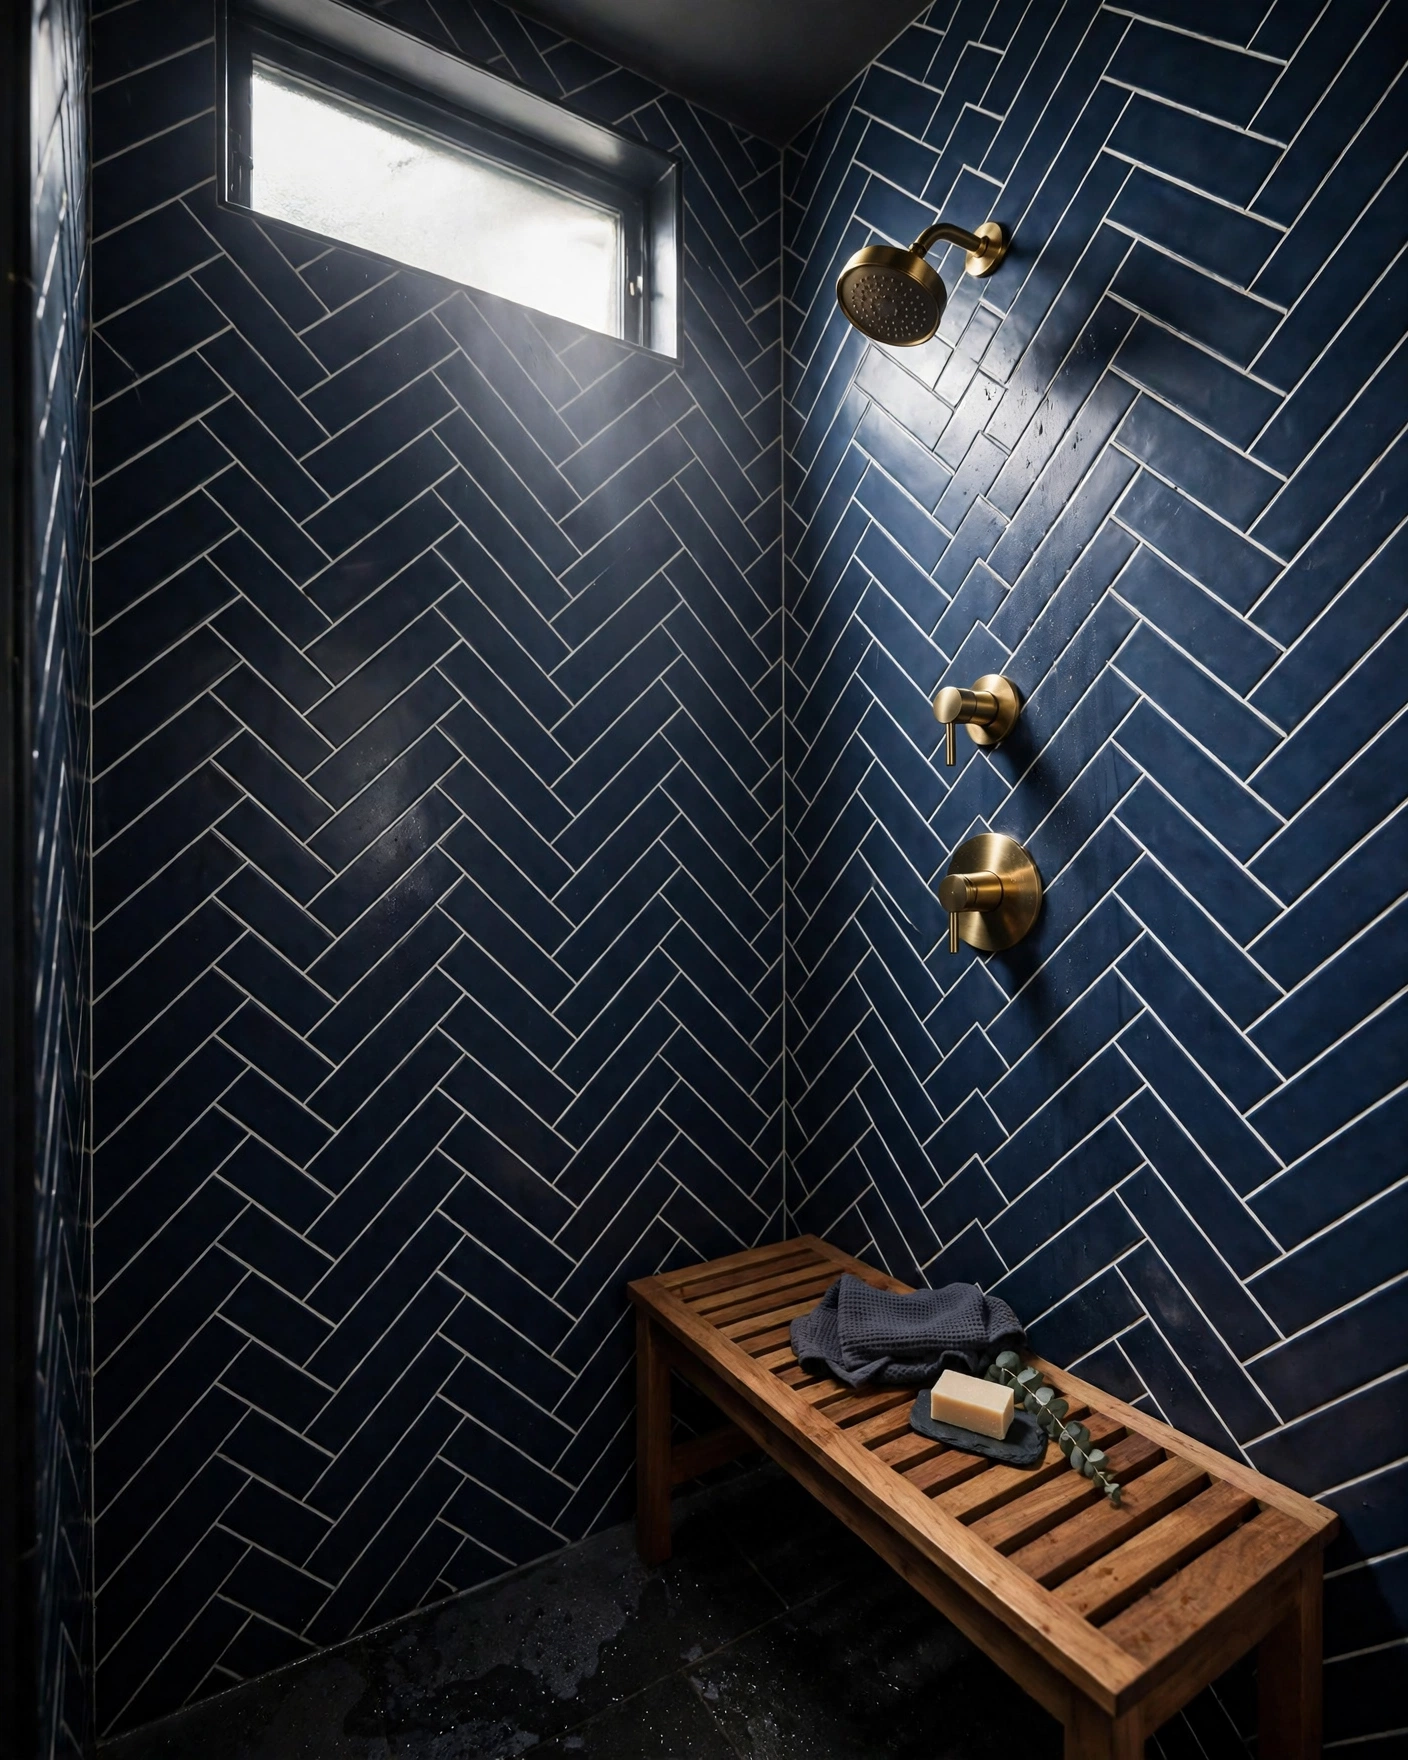
Unlike herringbone’s broken zigzag, chevron tiles are cut on the angle so the points meet in one unbroken ribbon. It is the sharpest, most tailored look on this list, especially in a deep colour with pale grout. Tip: buy pre-cut chevron tile to skip hundreds of mitre cuts.
6. Basketweave
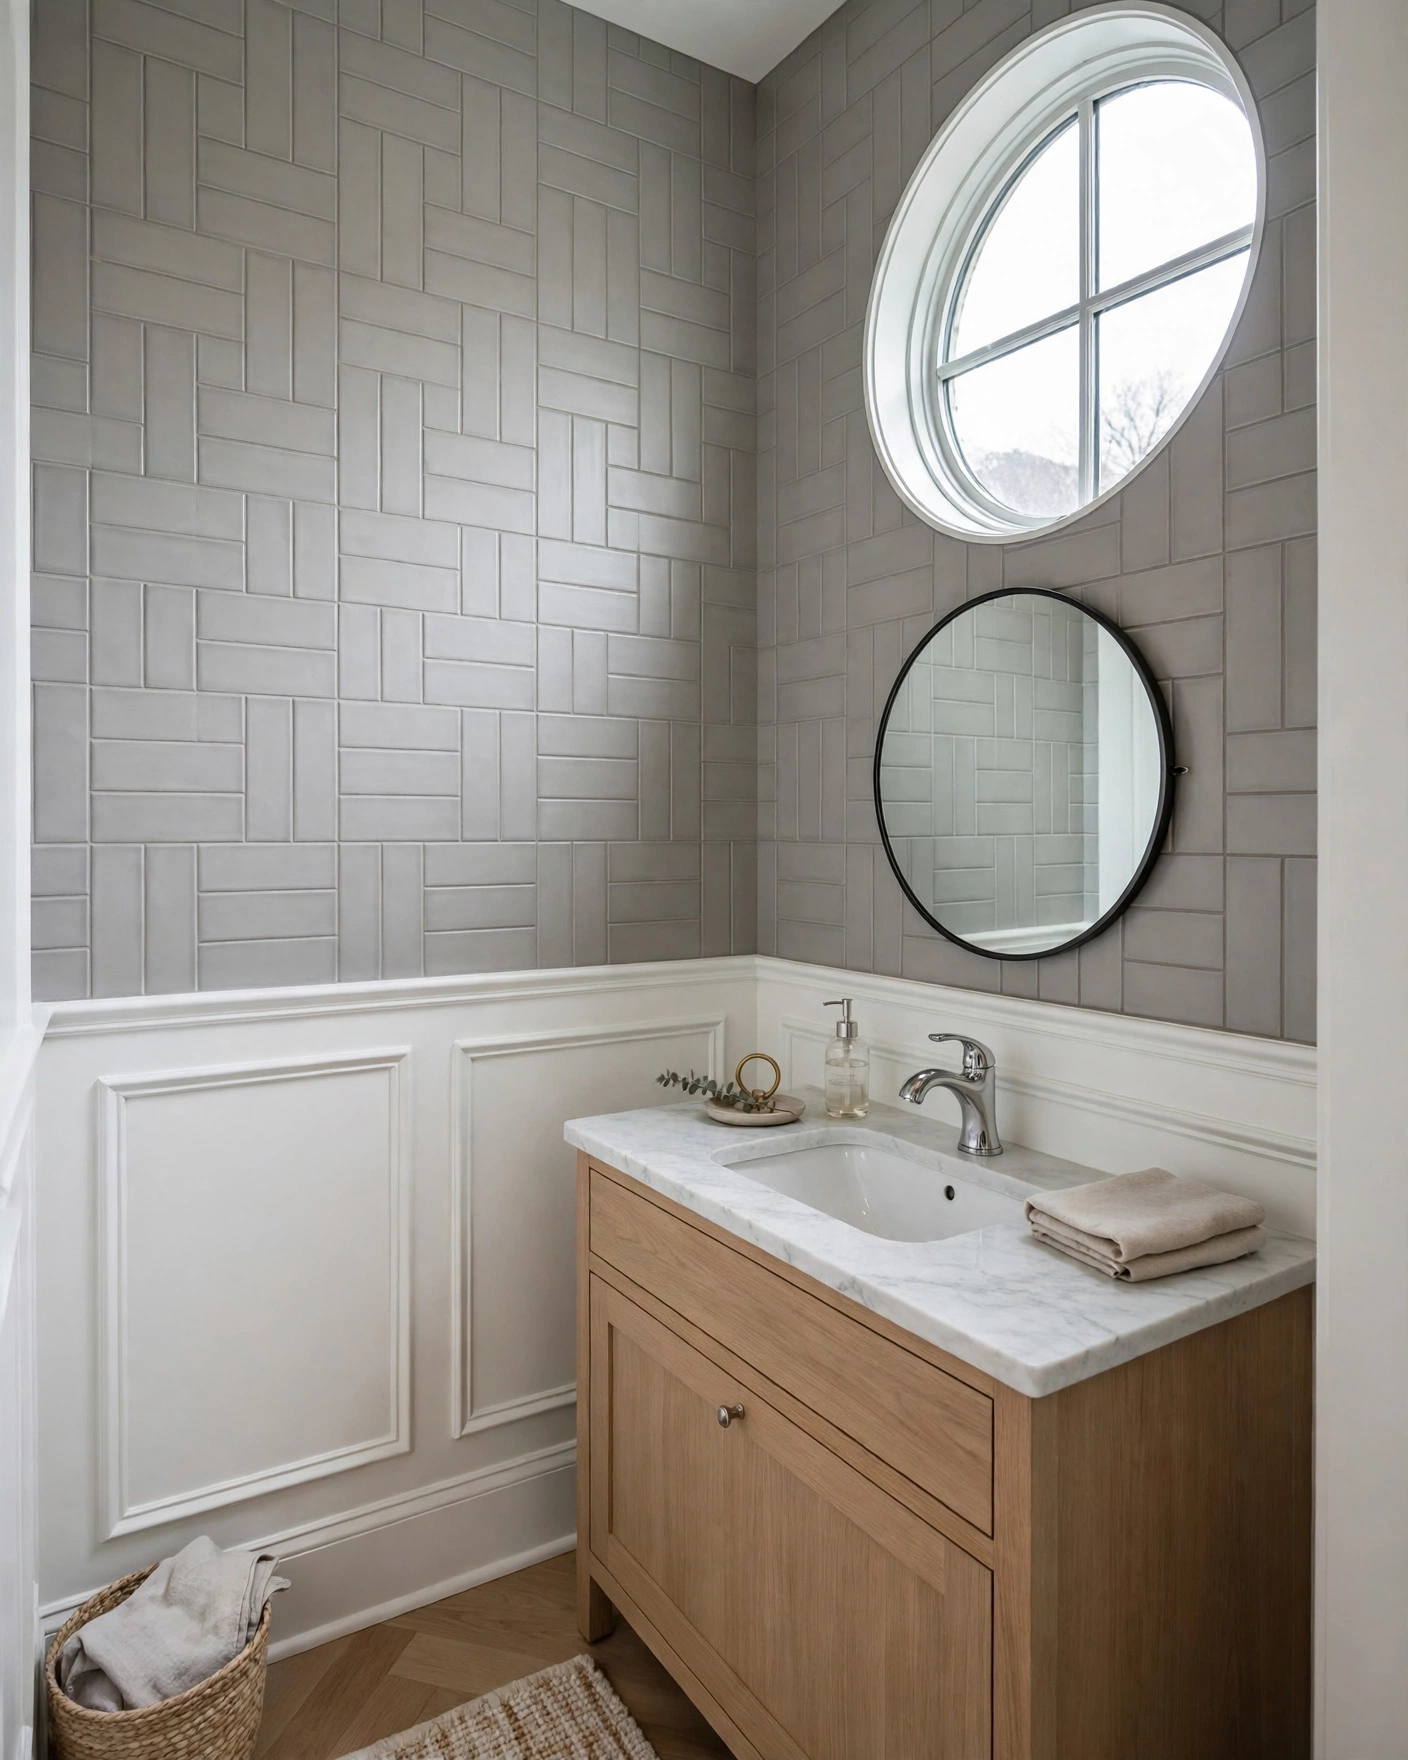
Pairs of horizontal tiles alternate with pairs of vertical ones, weaving over and under like a basket. The pattern adds vintage charm to powder rooms and suits traditional fixtures. Tip: basketweave eats grout lines, so choose a grout one shade darker to make the weave readable.
7. Crosshatch
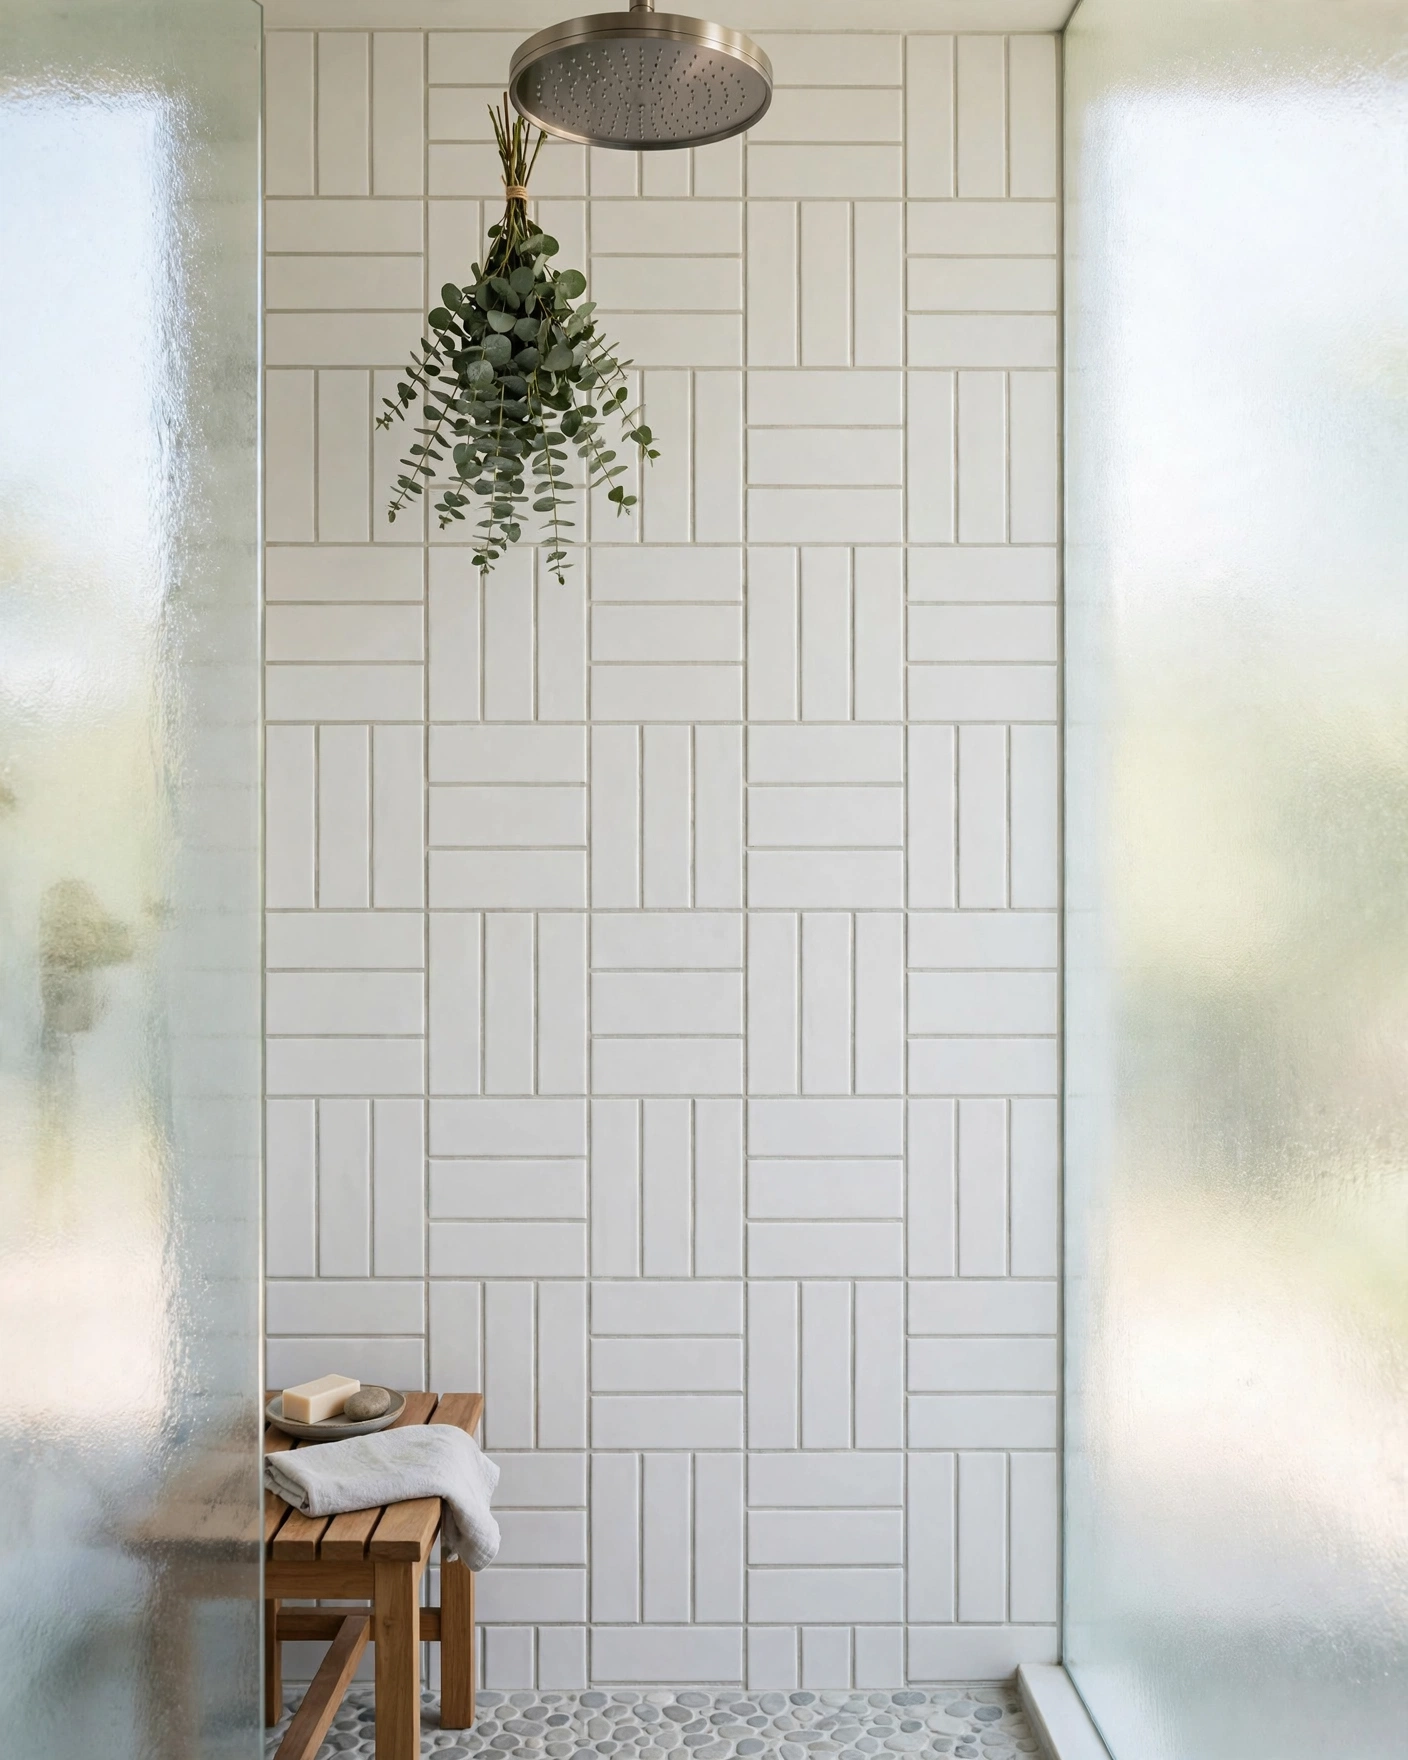
Crosshatch scales basketweave up: blocks of three stacked tiles alternate direction across the wall, giving a bold, graphic rhythm. It works best on one large shower wall in a single colour. Tip: snap chalk lines for every block boundary, because small drifts show quickly at this scale.
8. Diagonal Running Bond
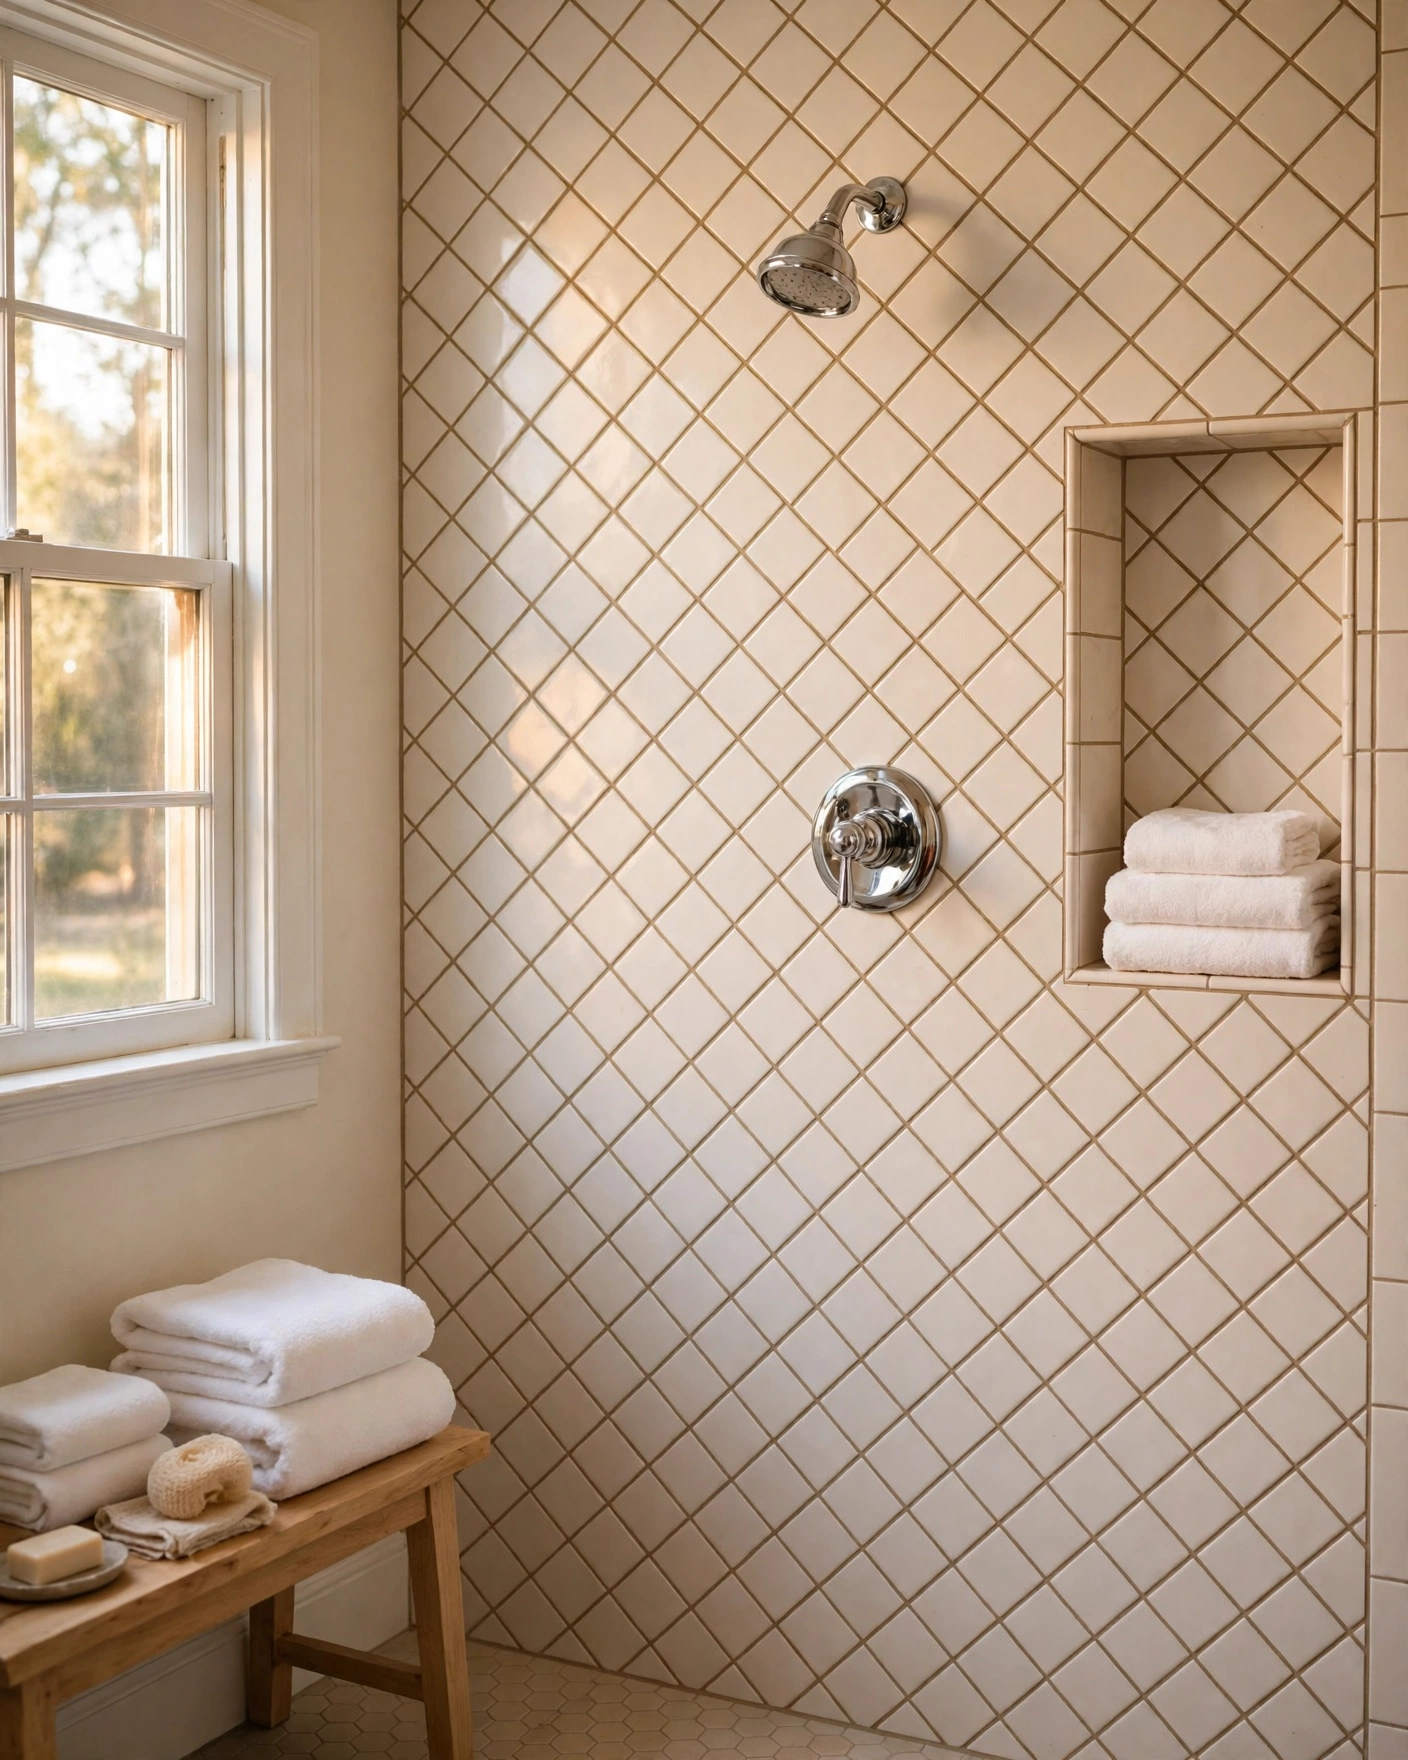
Simply rotating the standard brick layout forty-five degrees makes a small wall feel wider and far more dynamic. The diagonal lines lead the eye into the corners instead of stopping at them. Tip: expect extra cuts on every edge, so order fifteen percent more tile than usual.
9. Step Ladder
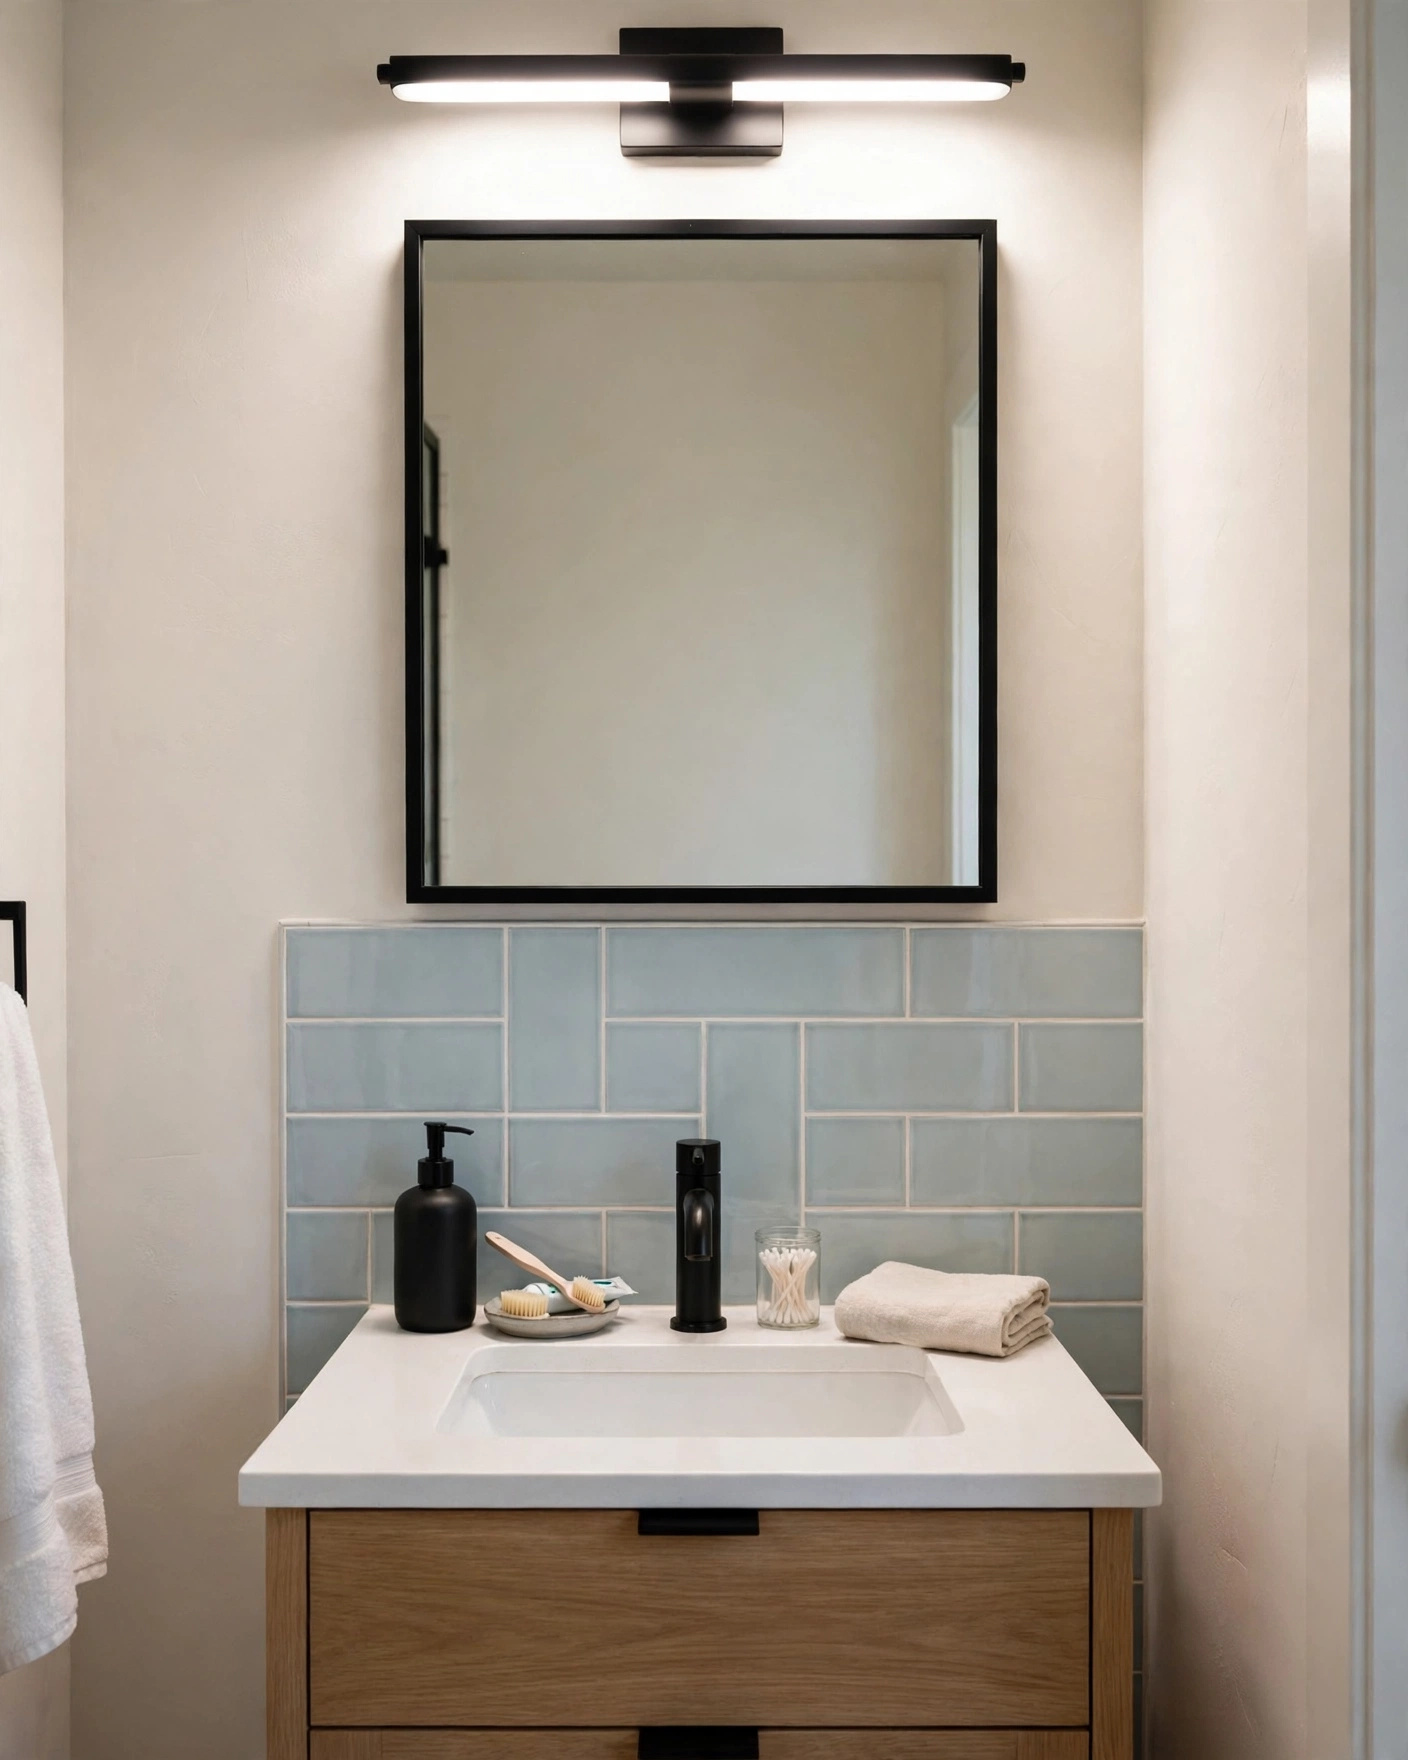
One vertical tile, one horizontal, marching across the wall like steps — this playful pattern suits a vanity splashback where its small scale stays readable. Glossy ceramic in a soft colour keeps it light. Tip: because every tile turns, use spacers on all four sides to hold the rhythm.
10. Patchwork Squares
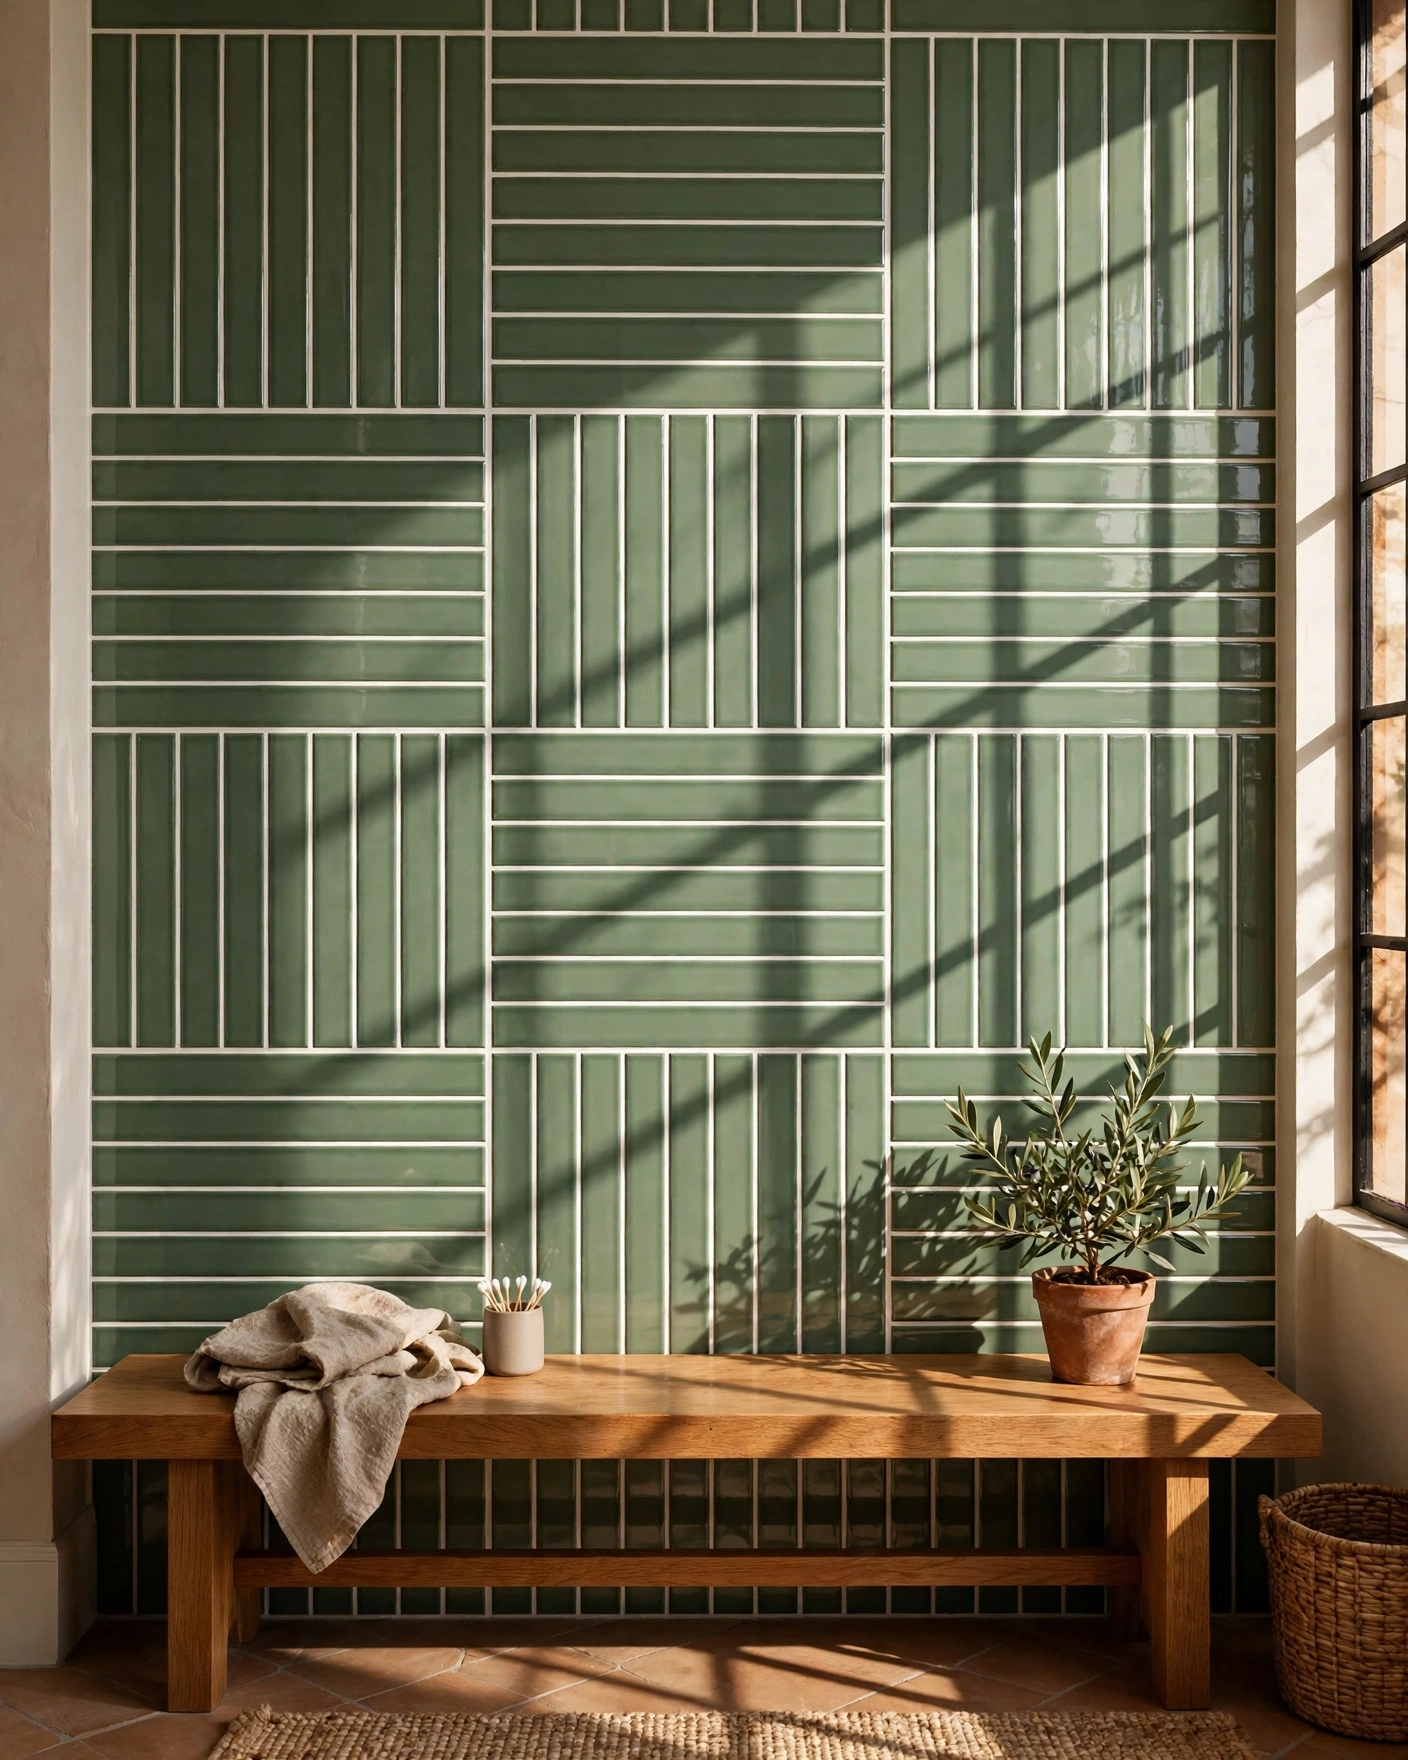
Group stacked tiles into squares of six or nine, then rotate each square ninety degrees from its neighbour. The wall gains a quilted, almost textile texture that photographs beautifully. Tip: keep grout joints perfectly consistent, because the square outlines are the whole design.
11. Oversized Subway, Cleanly Stacked
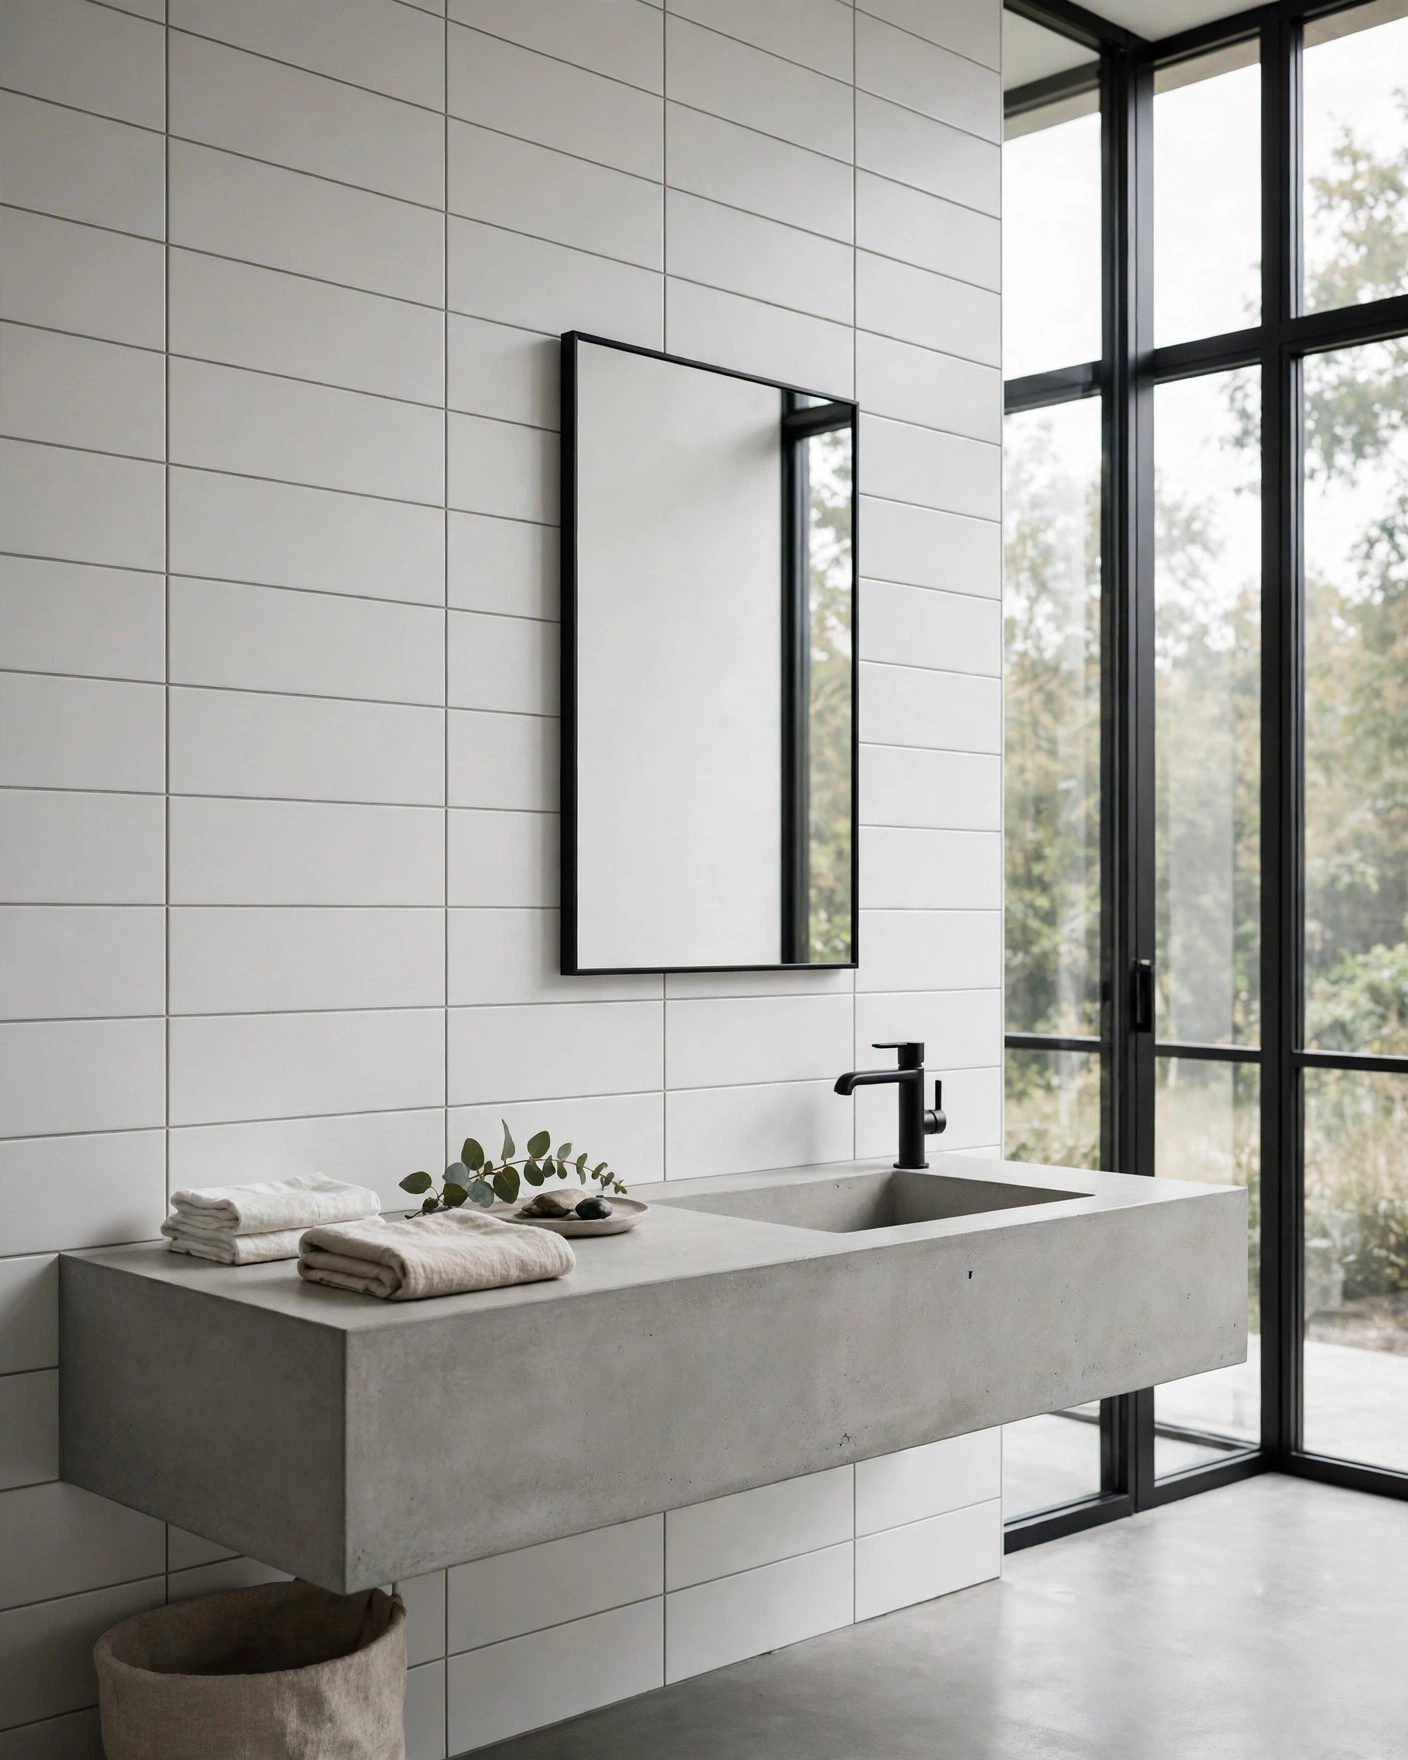
Scale the tile up to 4×12 or 4×16 and the humble stack suddenly looks architectural, with fewer grout lines and a calmer surface. A thin, colour-matched grout joint keeps the grid nearly seamless. Tip: bigger tiles telegraph uneven walls, so skim-coat flat before you start.
12. Beveled-Edge Subway in a Stack
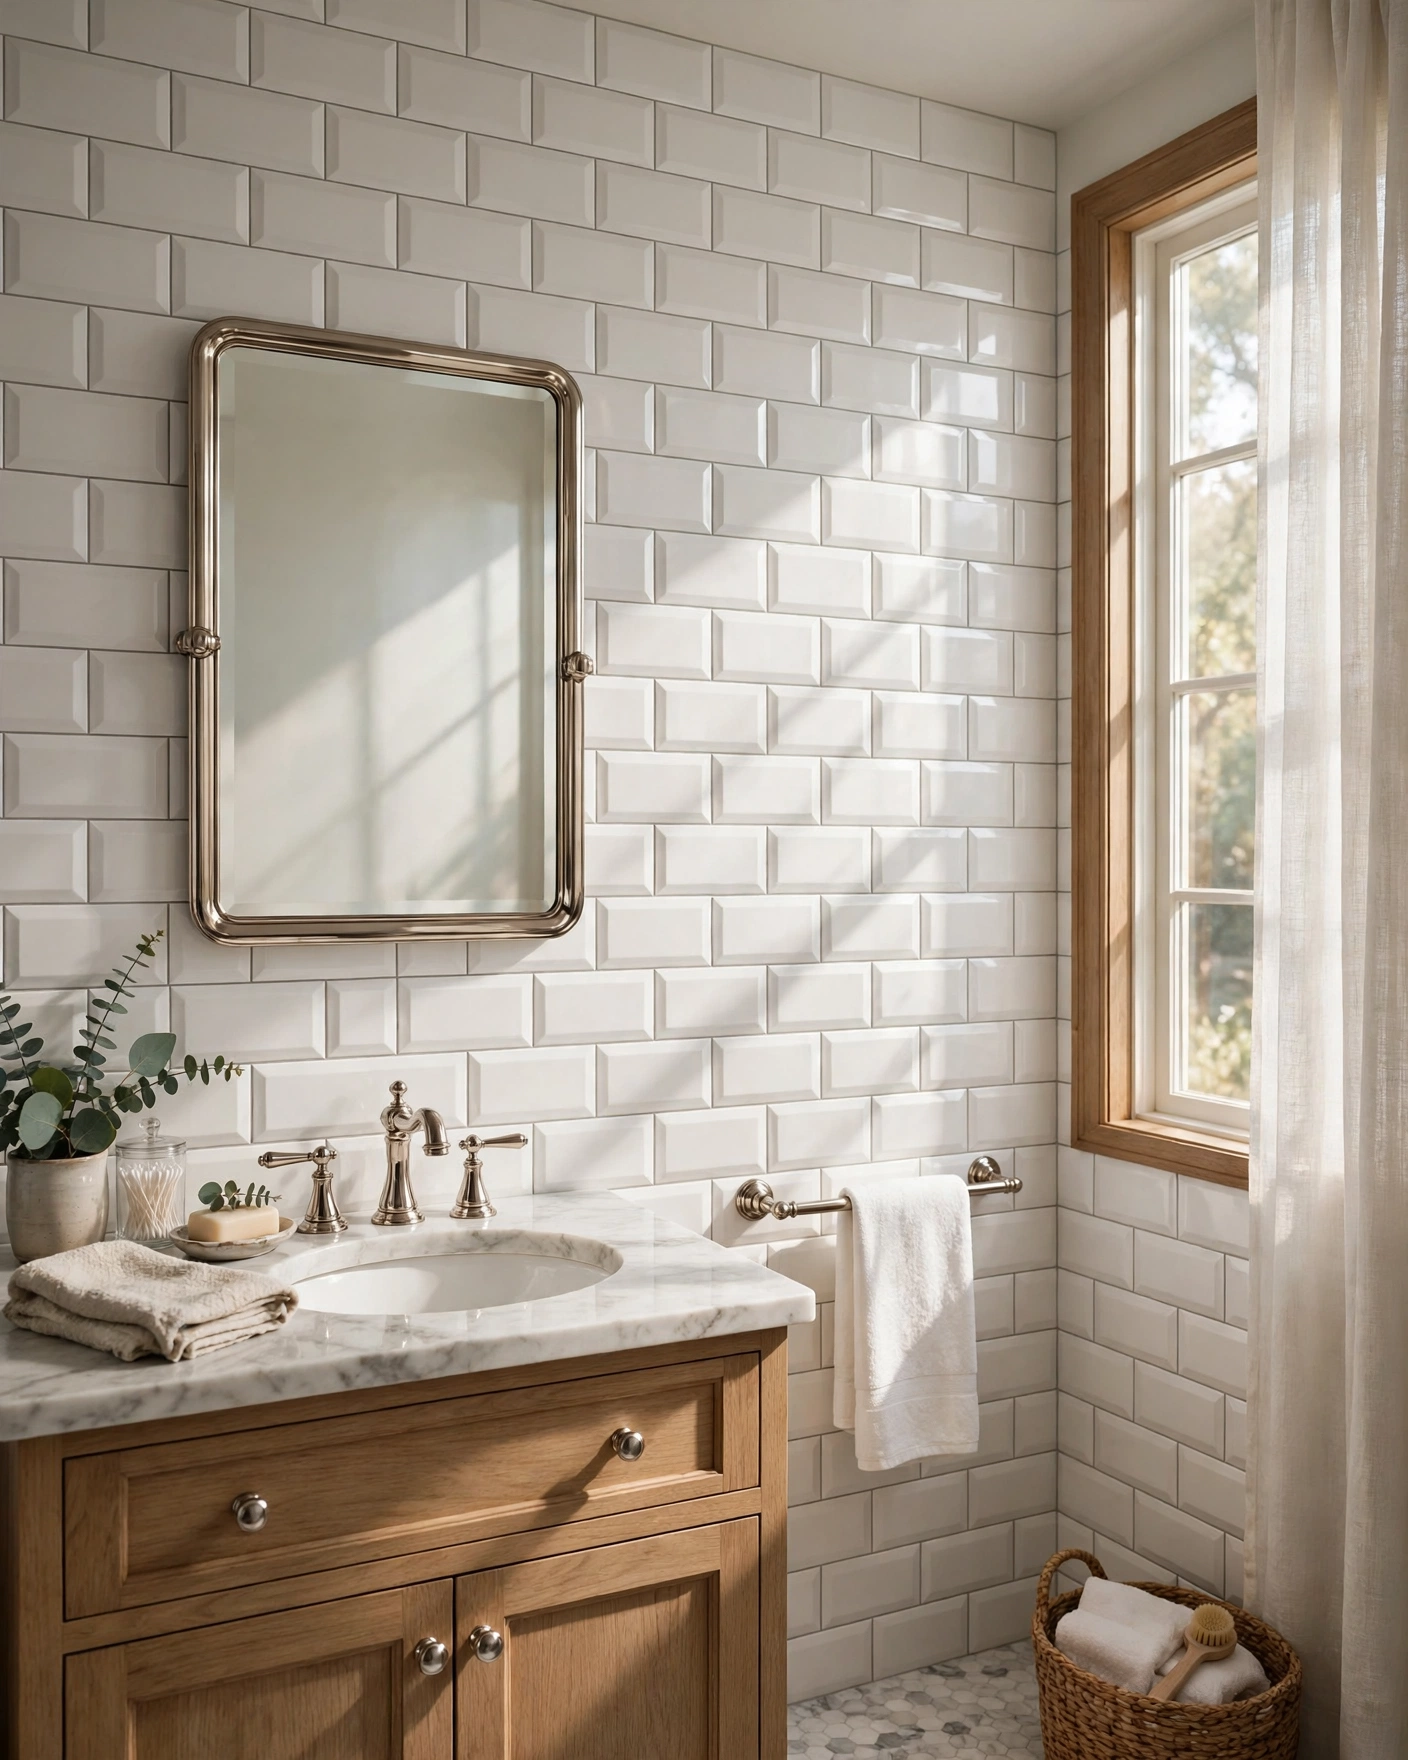
A beveled edge turns each tile into a little pillow of light and shadow, so even a plain stack gains depth. It is a classic pairing for traditional taps and marble. Tip: bevels collect soap film in showers, so plan a quick weekly squeegee if you use them there.
13. Two-Tone Ombre Stack
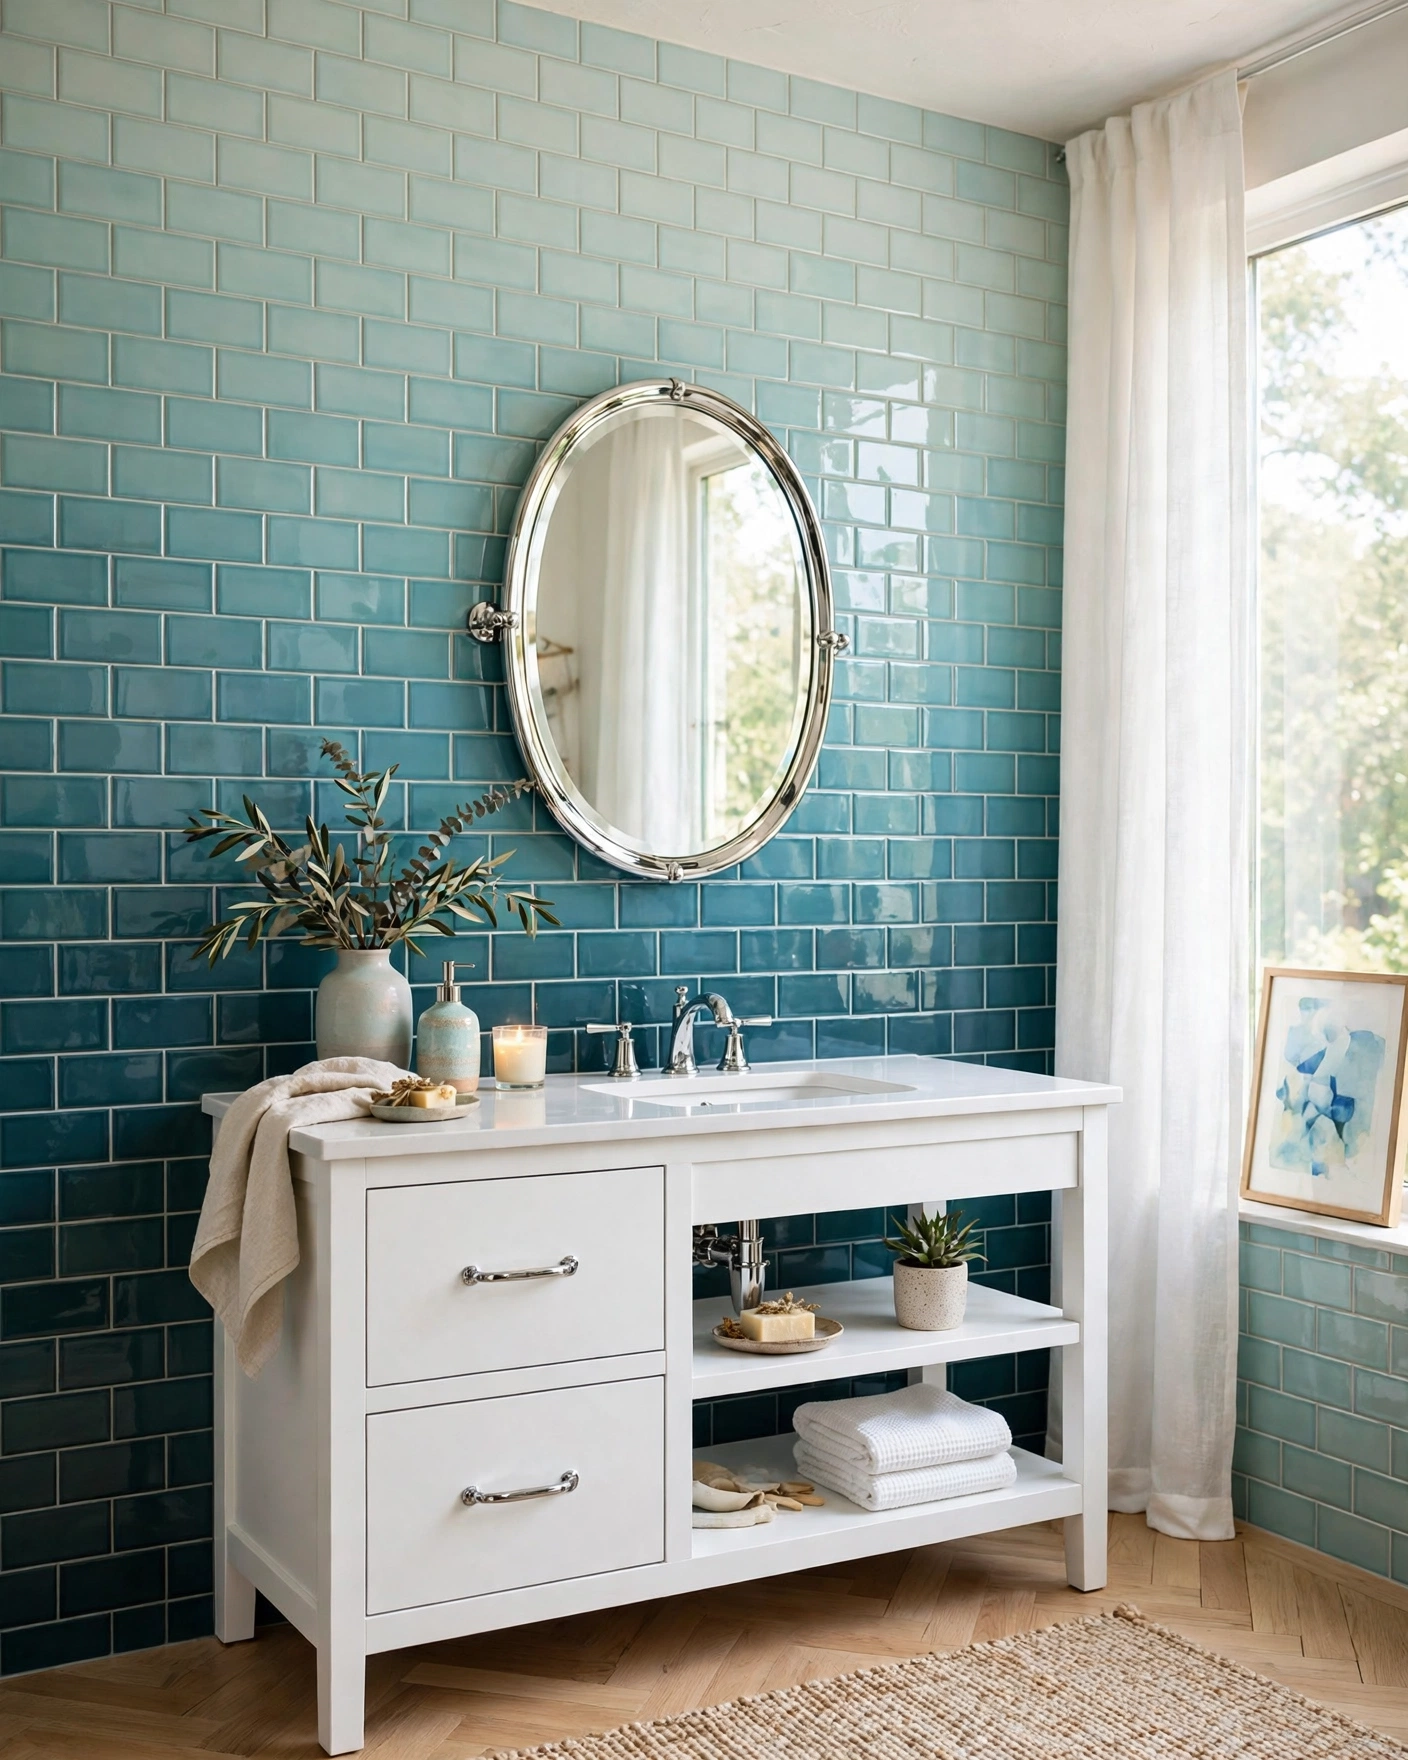
Sort three or four shades of one colour and stack them so the wall fades from dark at the floor to pale at the ceiling. The gradient lifts the room, and the darkest rows sit where splashes land. Tip: lay the whole gradient out and photograph it before fixing any tile.
14. Random Color Blend
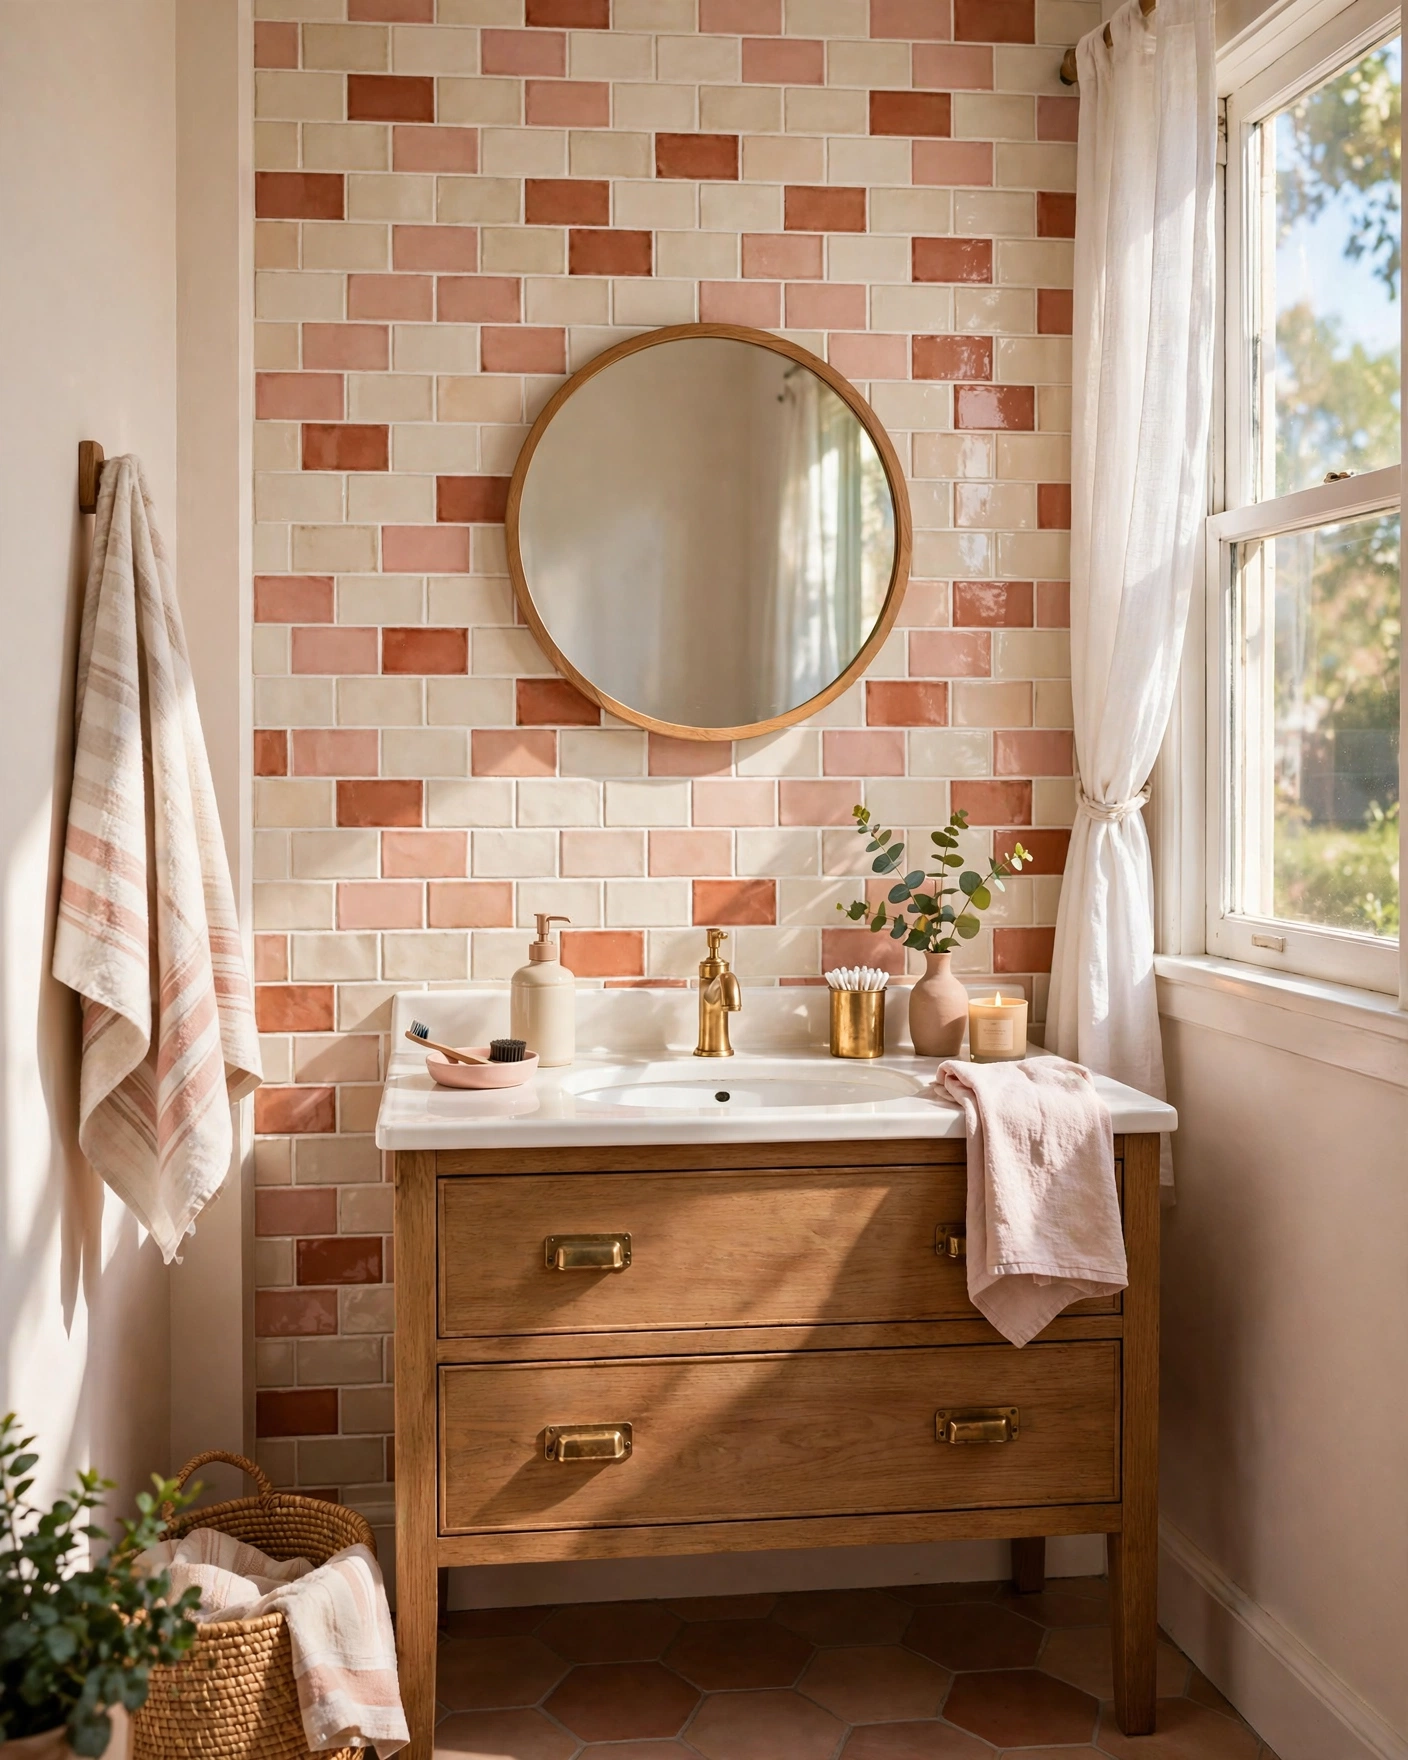
Shuffle two or three friendly colours and lay them in an ordinary offset so the mix, not the pattern, does the work. Cream, blush and clay tones feel warm and handmade together. Tip: pull tiles from several boxes at once so no single colour clumps in one corner.
15. Framed Panel with Pencil Trim
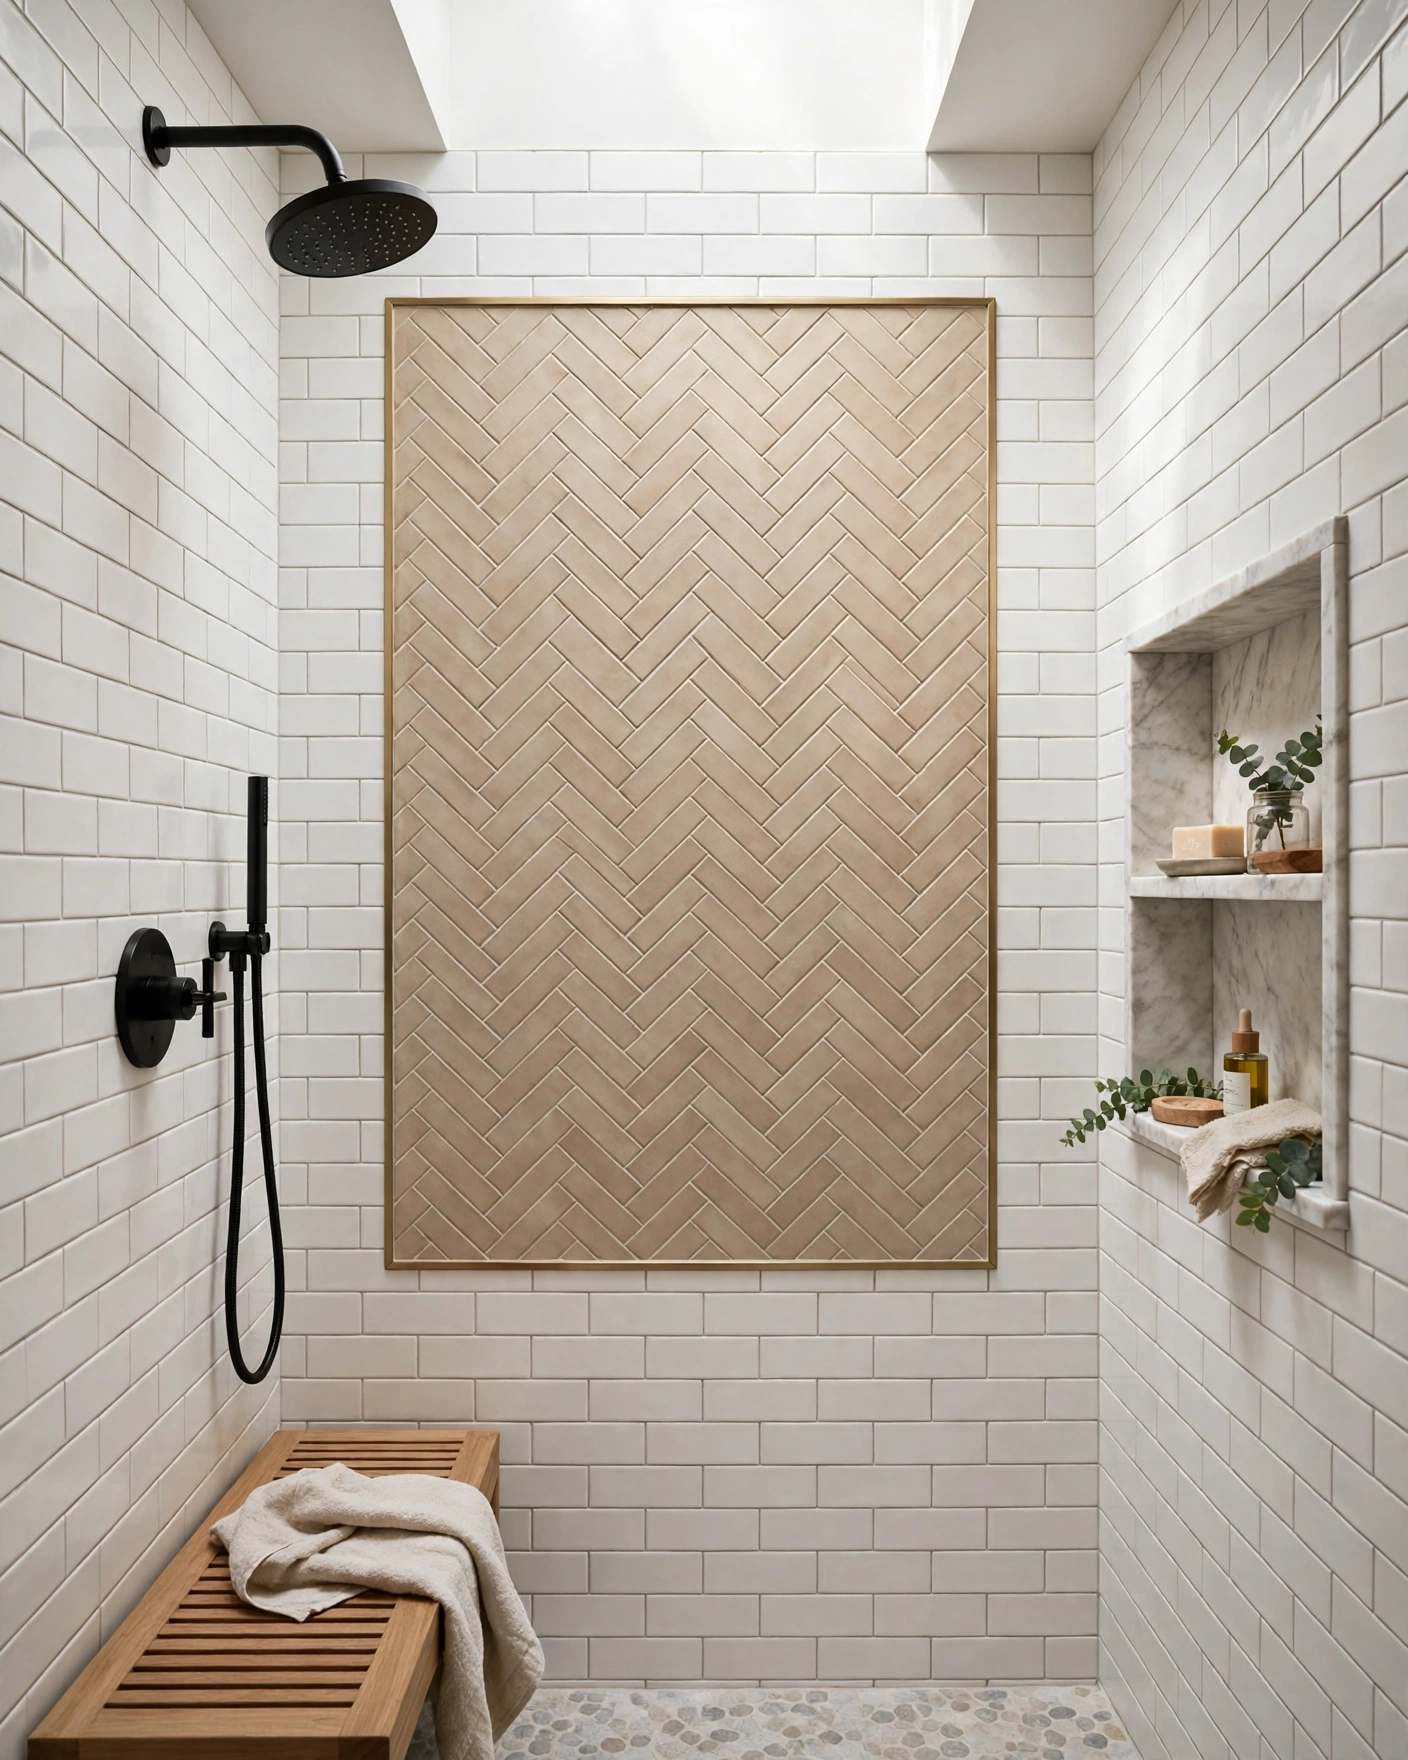
Use an expensive-looking pattern only where it counts: a herringbone or chevron panel behind the shower head, bordered with pencil trim, inside a plain stacked field. The frame makes the panel read like artwork. Tip: this trick can cut patterned-tile costs by two thirds on a big wall.
16. Wainscot with a Chair Rail Cap
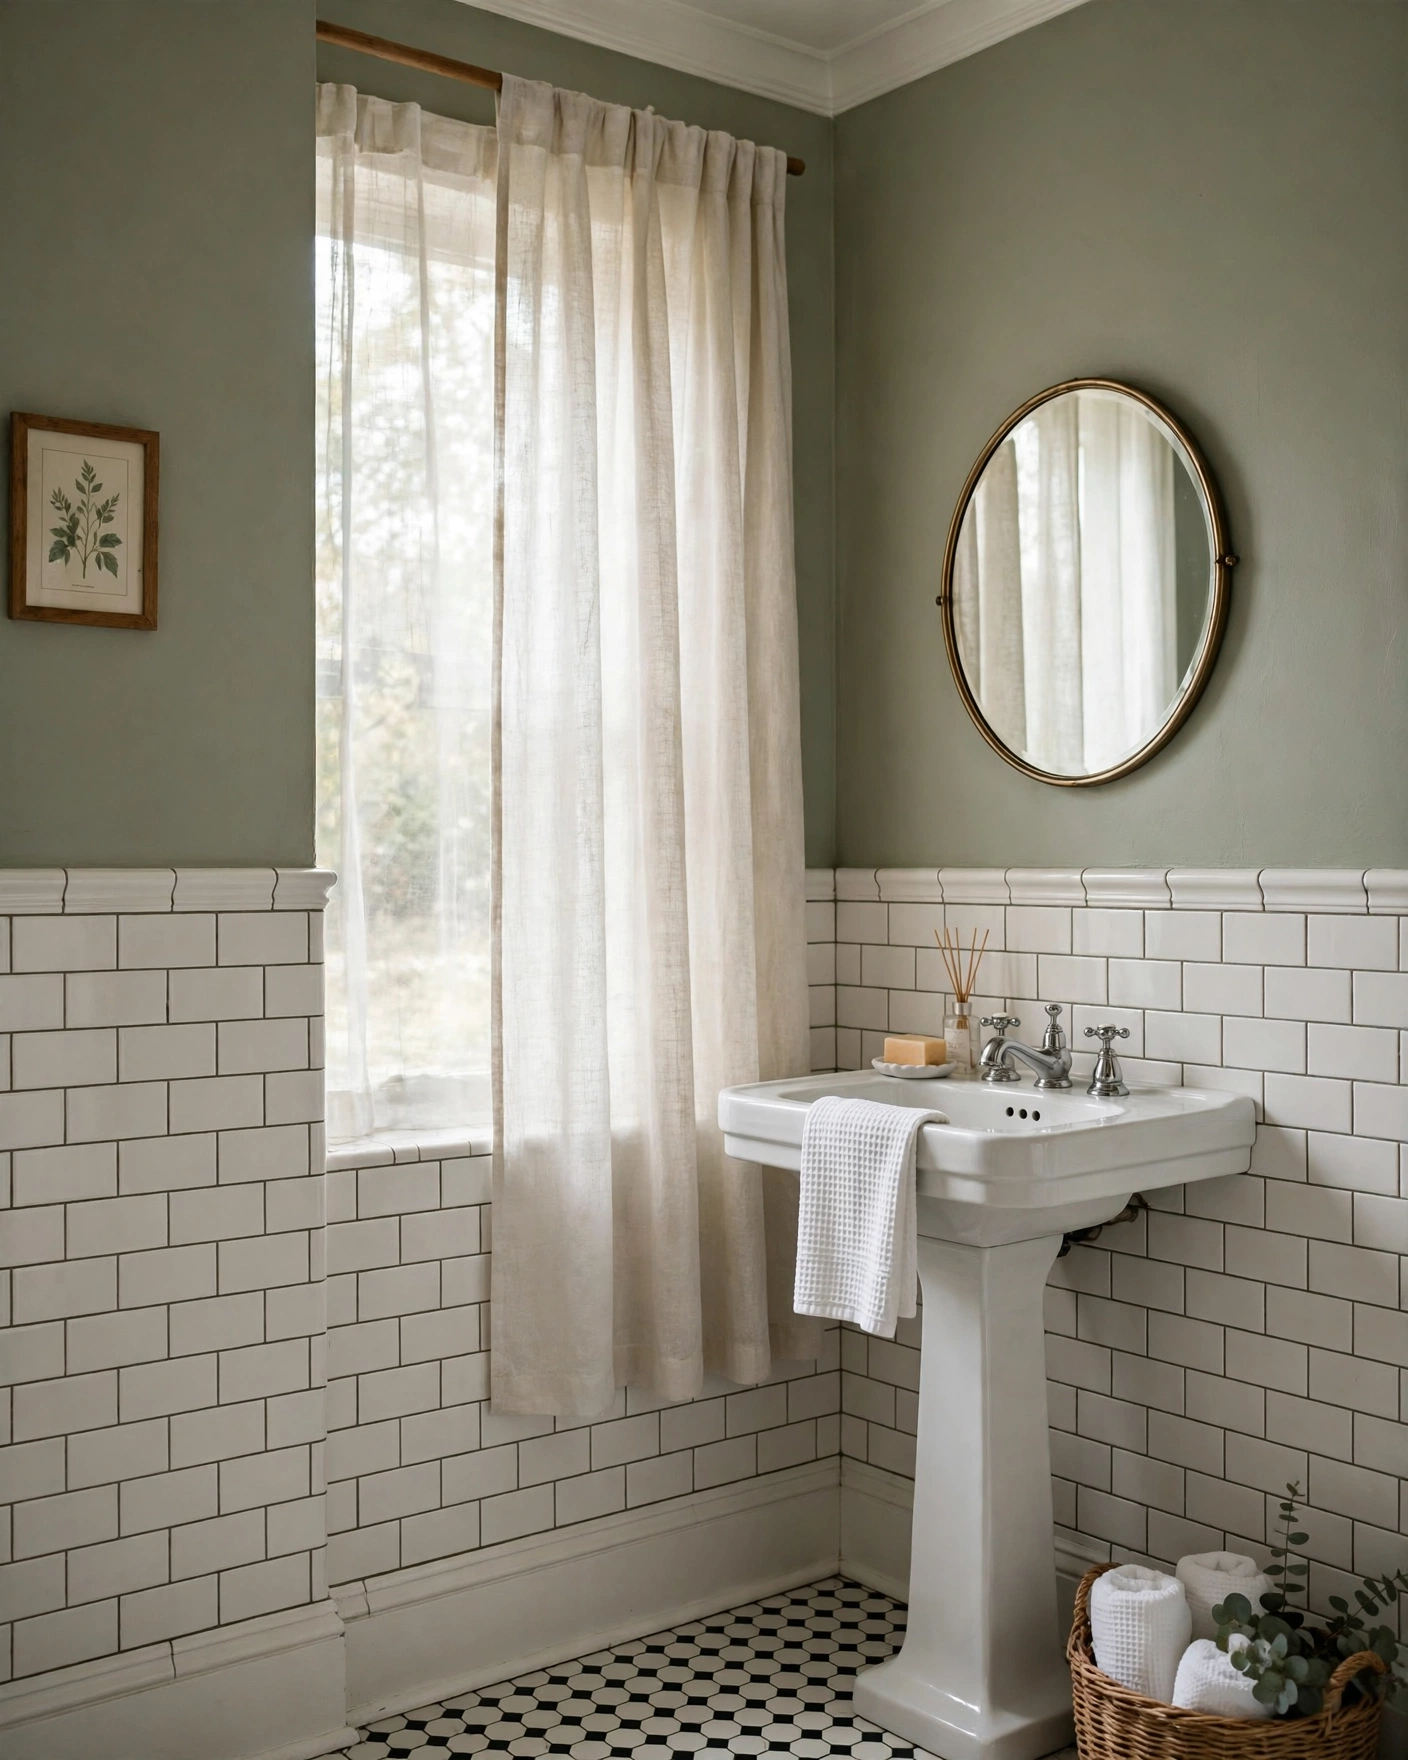
Tile only the lower half of the wall and finish it with a rounded chair rail tile, leaving paint above. You get splash-proof walls, a period look, and far less tile to buy. Tip: end the wainscot at sink height so the rail doubles as a splash guard.
17. Skinny Subway, Tightly Stacked
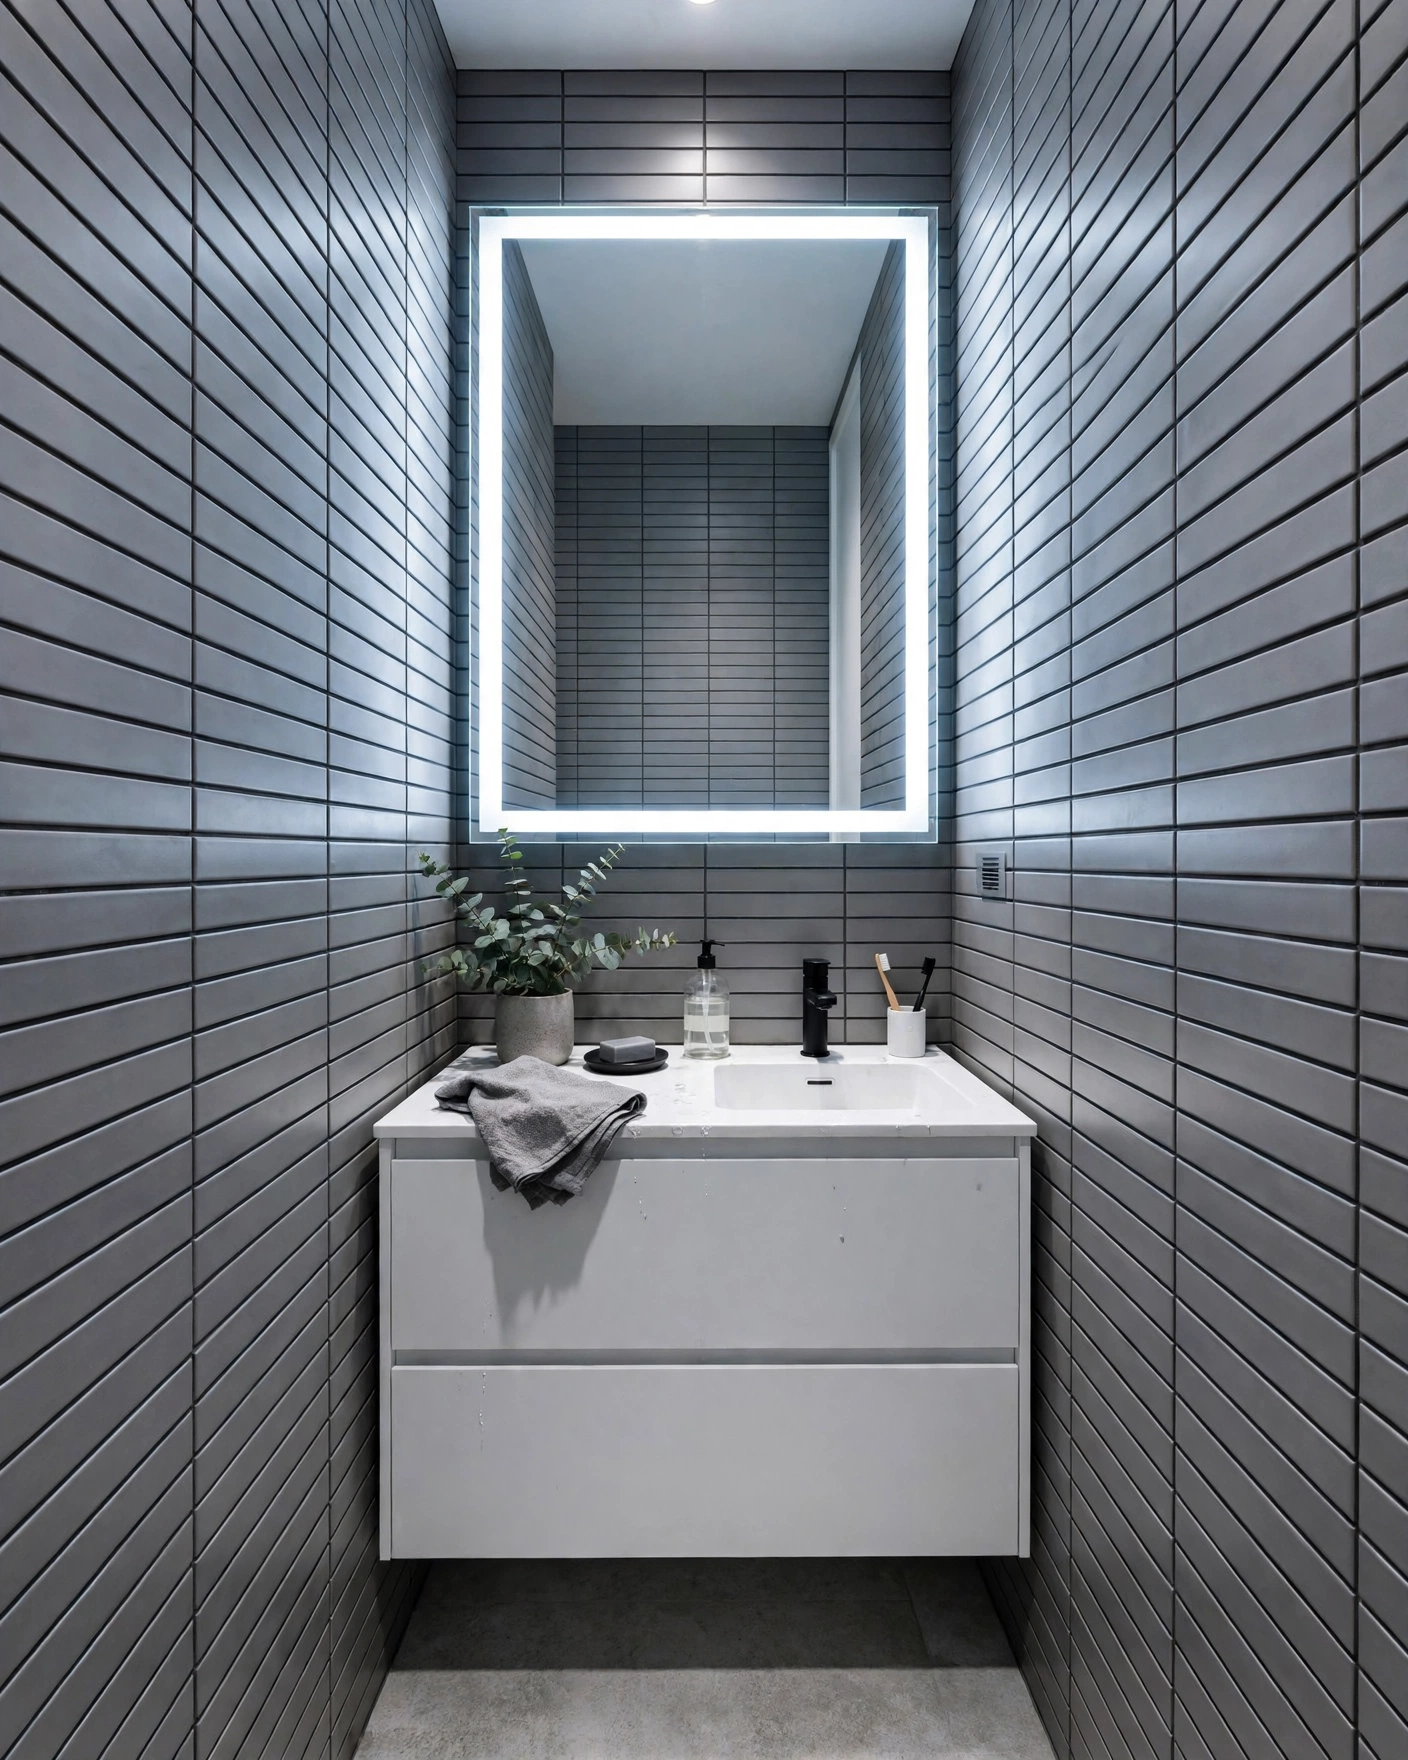
Long, thin 2×8 tiles stacked with hairline joints create a fluted, almost timber-like texture that feels very current. Keep the palette monochrome so the fine lines stay the focus. Tip: skinny tiles exaggerate any bow in the wall, so use a levelling system for crisp rows.
18. Colored Grout on a Classic Offset
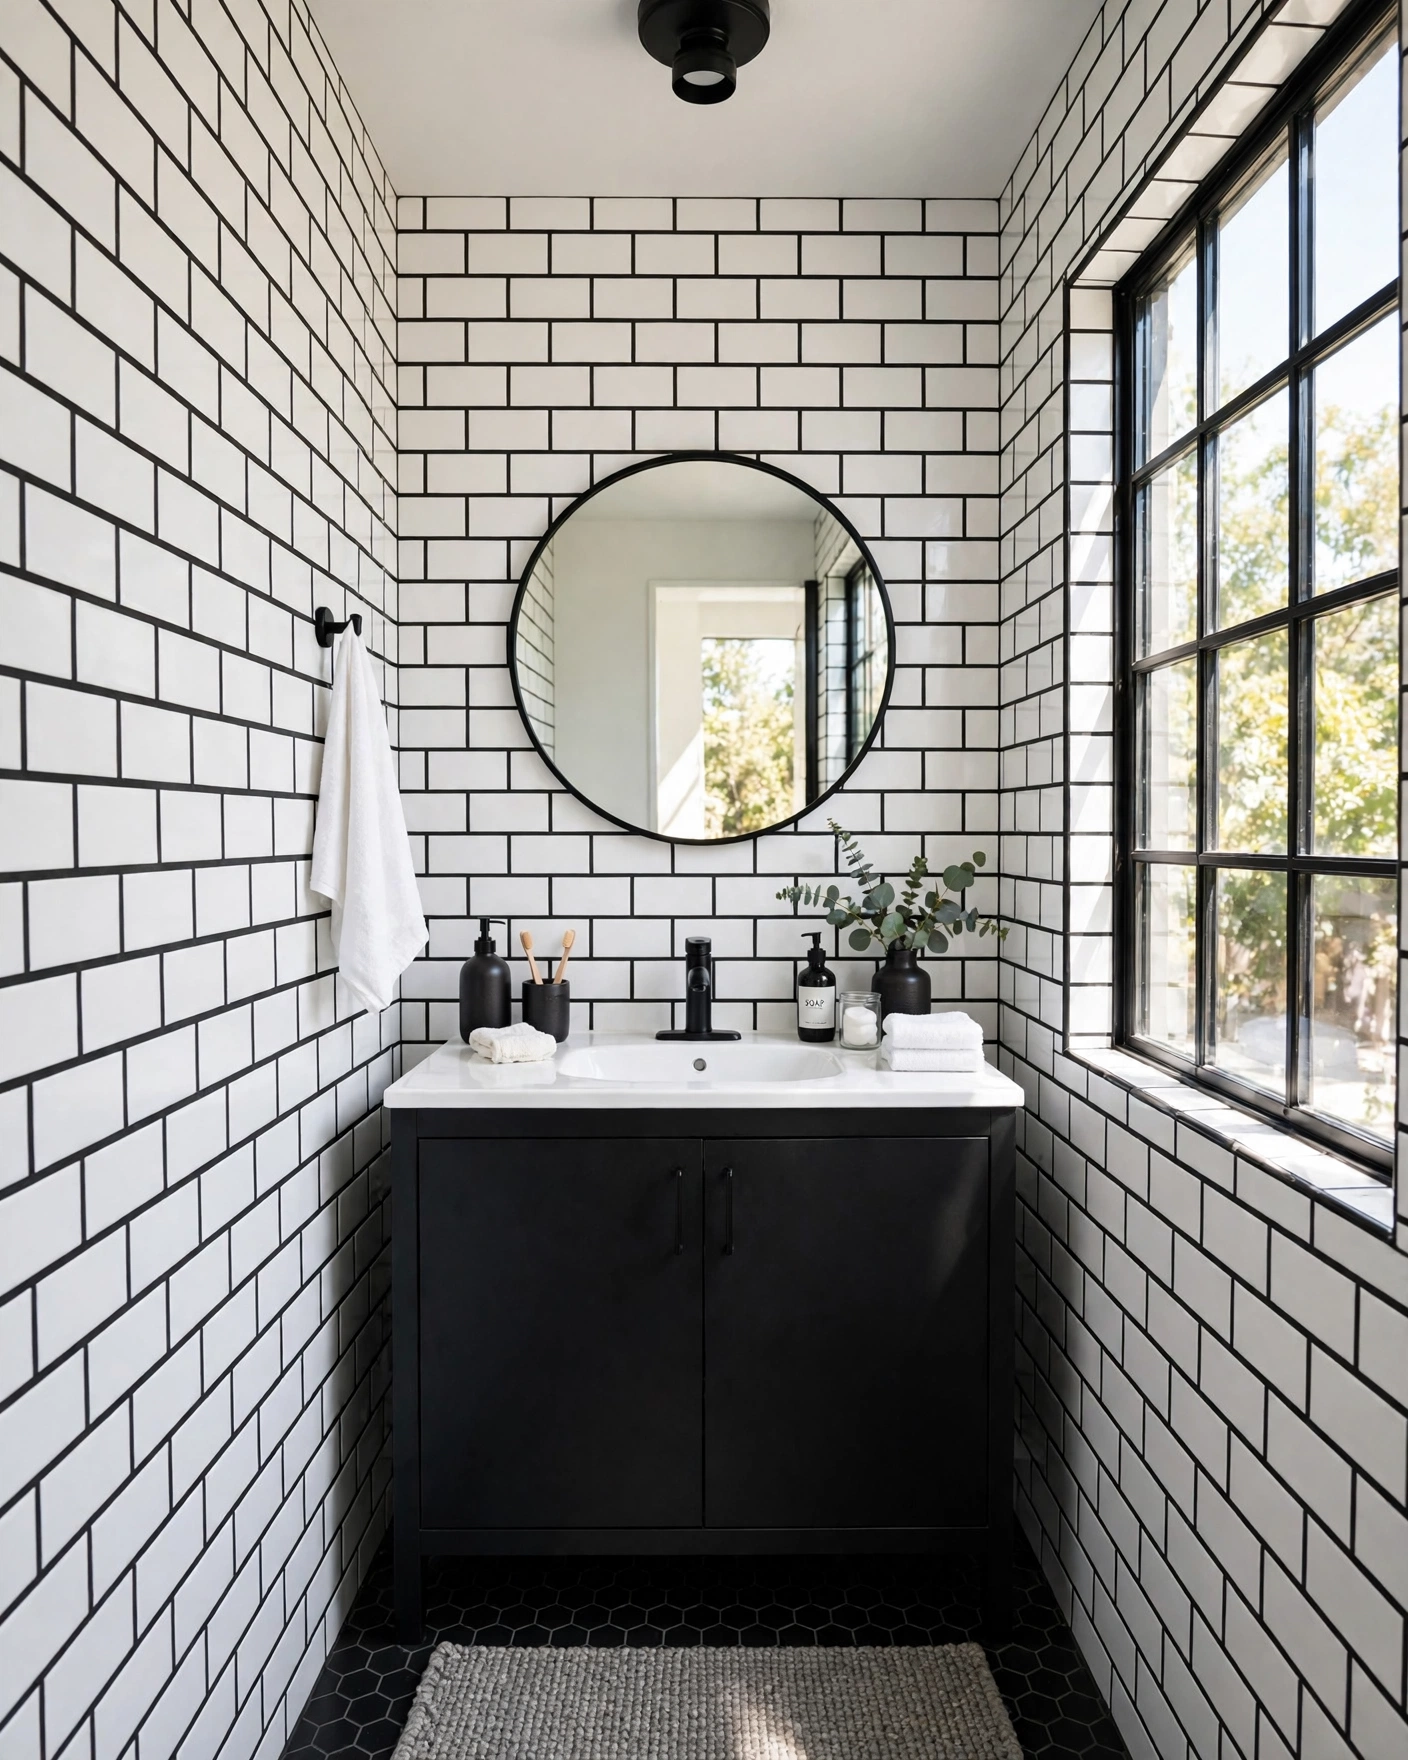
Keep the easiest layout of all, but swap white grout for charcoal, sage or even terracotta so every brick is outlined like a drawing. The pattern is the grout, and it costs nothing extra in tile. Tip: dark grout hides stains but shows soap residue, so seal it well.
19. Wrap the Shower, Walls and Ceiling
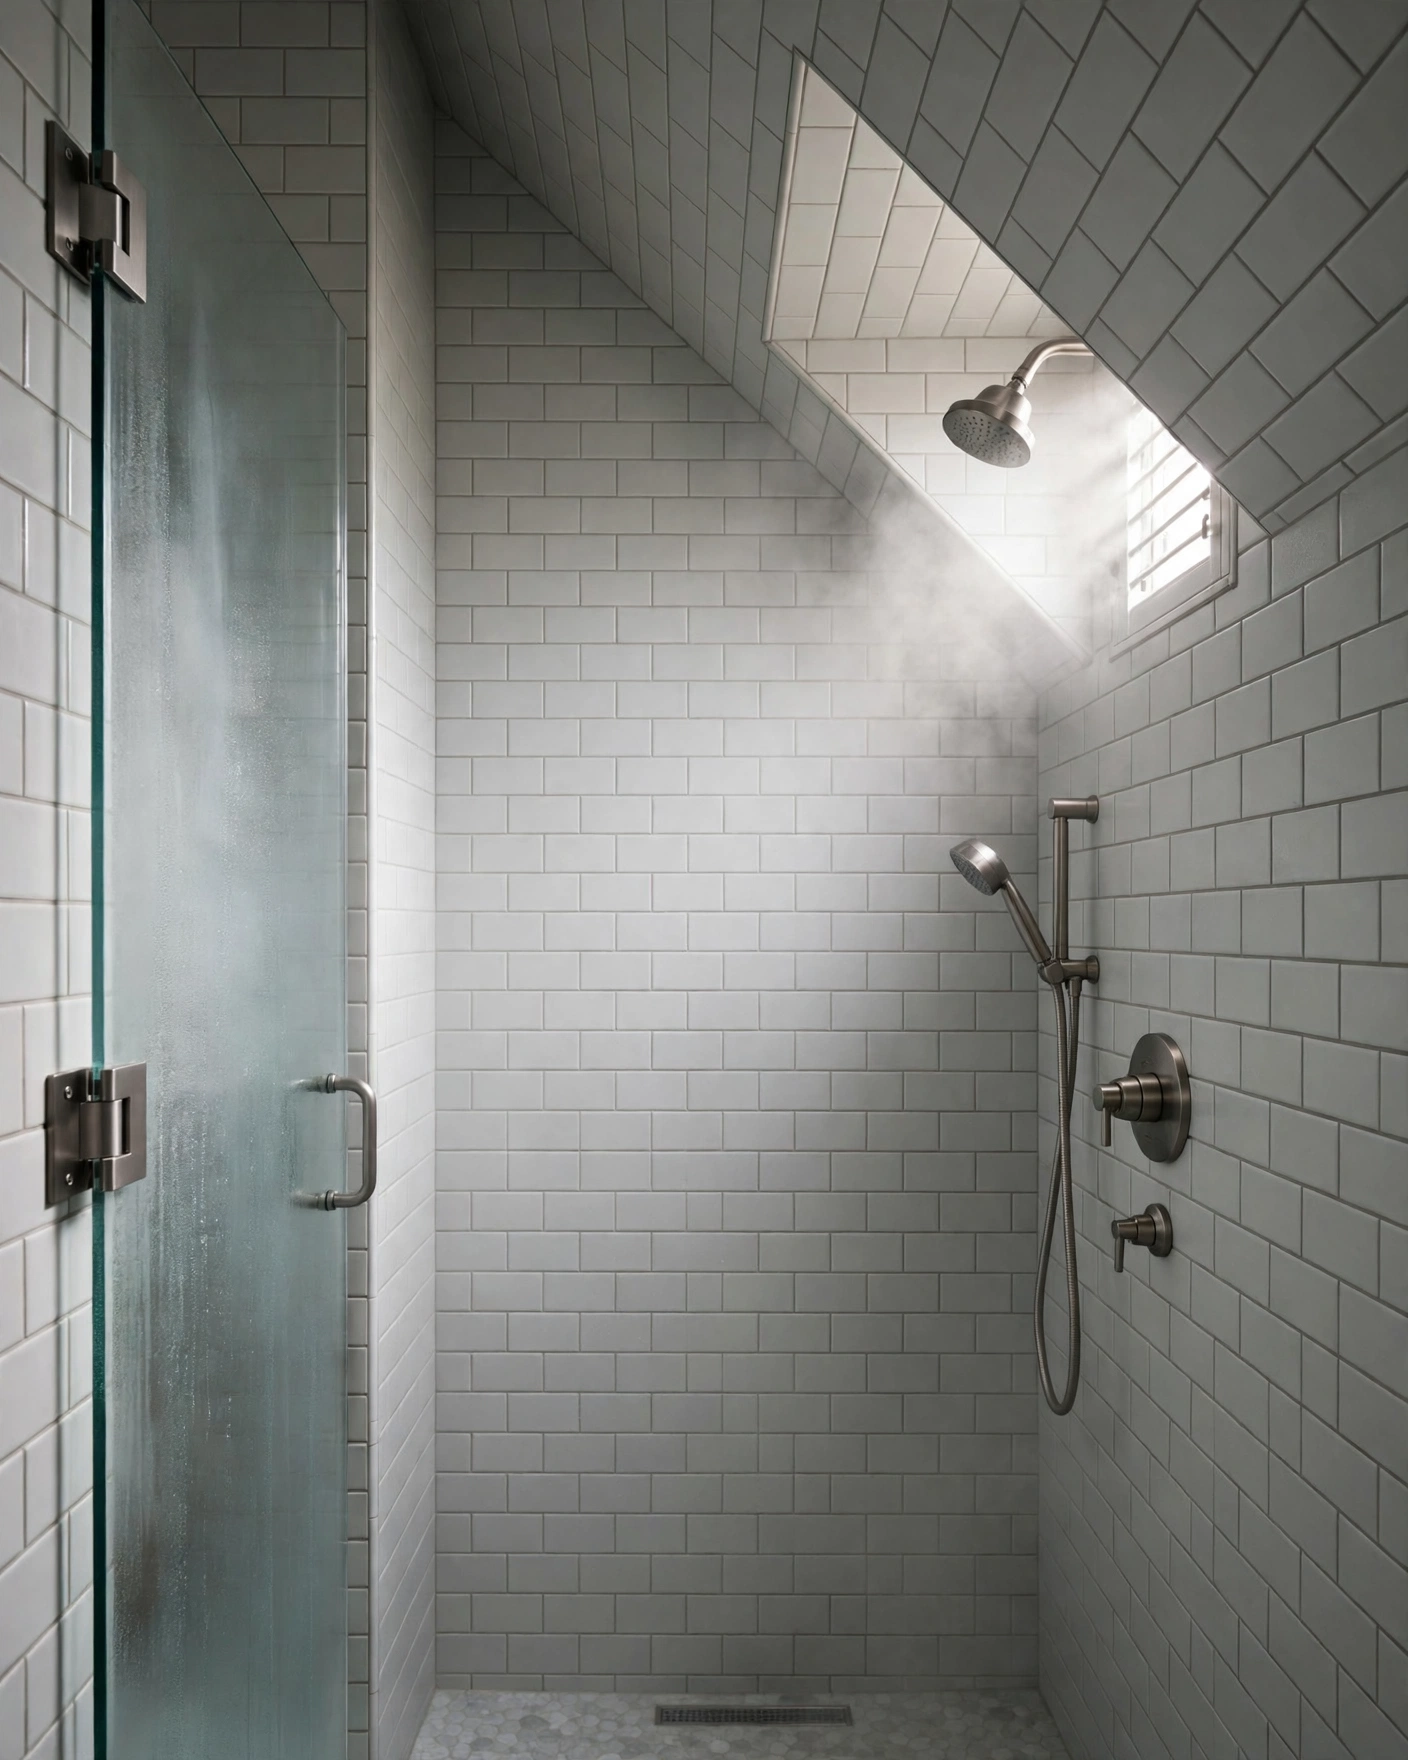
Carry one simple stack pattern over every shower surface, ceiling included, and the enclosure becomes a calm tiled cocoon. Pale glossy tile keeps the wrapped space from feeling closed in. Tip: use a quality waterproof membrane on the ceiling, since it takes the most steam.
In Summary
Nineteen patterns, one humble rectangle. Whether you love the woven calm of basketweave, the sharp ribbon of chevron or the quiet grid of an oversized stack, the right layout turns standard subway tile into the most custom-looking surface in the room — usually for the same tile budget as the standard brick.
Start with the room’s proportions: vertical patterns lift low ceilings, diagonals widen narrow walls, and fine patterns suit small splashbacks. Order a sample board, prop it up in your bathroom’s own light, and let the pattern earn its place before the thinset comes out.
Leave a Reply